Showing posts with label SBS 2011 Essentials. Show all posts

Wednesday, December 04, 2013

Using the Windows Credential Manager to Store Server Credentials in Windows 8.1 (and on Surface!)

My wife got a new laptop, first one in 10 years.  I’m very proud of her.  She’s the opposite of me, and pretty much doesn’t like change on her computer.  This is most likely due to the fact she touches a computer for less than 1/2 an hour a day, and doesn’t want to spend 10 minutes of the 30 figuring out where the “File” menu went (yes, the IE7 upgrade just about killed my wife).  She went with the Lenovo Yoga 2 Pro. It’s an amazing laptop, but doesn’t have a TPM chip, so I can’t use it for work (otherwise I’d have one too!)  The screen is breathtaking, but I digress.

We have a Home Server 2011 in our house (obviously), but it doesn’t back up UEFI machines (not that I know of anyways) via the Client Backup.  So installing the Launch Pad seemed a bit of overkill so she could just go to \\server.  Her Windows Explorer has a link to the root of the Server share so she can get to the pictures, the videos, the TV shows, and so on.  I’m a big fan of security, and she has her own account on the server, but I couldn’t get her username and password to save for the server through a reboot.  And as you can probably guess, it has to be easy for her (a click to get access). 

I ended up simply saving this into her Windows Credential Storage (details below).  Worked like a charm.  It got me thinking, does this work on my Surface 2?  Sure enough it did!!  This means that I can simply access the server without providing credentials every time.  Now when I’m in my home, my Surface can just access an additional 4TB of data, right from inside the Metro Apps (more on this in my post "Adding Server Shares to Modern Photo App"). 
Let me tell you how to use the credential manager first. 
  1. Hit the Start key or swipe out the charm bar and press the Start button
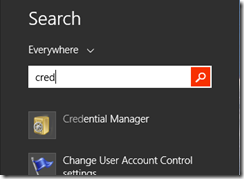
  2. Type in Cred to search the start menu for the Credential Manager. Search for 'Cred'
  3. Launch the Credential Manager, and select the Windows Credentials button. 
  4. Under that button, simply click the Add a Windows credential.
  5. Fill out the wizard with the name of your server, in my case “SERVER”, my credentials Fill out the Add a Windows Credential Wizard
  6. Notice it’s in the list and then close the Credential Manager
Now you may try this instantly and it might not work.  This is most likely because you’ve already tried to connect to this server and stored the fact that you don’t need a username or password.  A reboot or sign-out/in will fix that as long as the item stays in the Credential Manager.  You can also open the command prompt and type in “net use * /d” to delete all active connections which will force Windows to re-open new ones, using the Credential Manager.

For reference, here is the official Windows Help topic on this.

Monday, March 26, 2012

Extreme Make-Over–Take 2: Cincinnati Housing Partners Increase Efficiency

Well, Microsoft and HP are at it once again, performing an extreme make-over of a not-for-profit company.  In this case they are helping lower income families get their first home, Cincinnati Housing Partners.  Once again, Microsoft came together with HP lots of awesome technology including Windows Small Business Server 2011 Essentials running on an HP Proliant Microserver and Windows MultiPoint Server running on an HP ML110. as well as some other great hardware from HP (Printers and UPS devices!). 

Check out the video:

Find the Official HP Blog post here, and the Case Study here.

If you were wondering for previous Extreme Makeovers, you can see the first one here.

Learn more about Kevin Royalty and his company here.

Tuesday, January 24, 2012

Wiki your way to Small Business Server knowledge & Best practices

The Home and Small Business Server team has posted a forum post with links to the separate Wiki articles they are maintaining to help you get the most out of your server platform.  The Forum post with all the links (looks like it’s being updated over time too!) is here.

What appears to be currently missing from this article is the Router Wiki links

Other items are copied below for your ease of browsing (note this might be outdated, check the actual link for an up-to-date version)

Server Deployment and Platform Configurations

  1. Troubleshoot Windows Small Business Server 2011 Essentials, Windows Home Server 2011, and Windows Storage Server 2008 R2 Essentials Installation Issues (June 2011) - http://social.technet.microsoft.com/wiki/contents/articles/3342.aspx
  2. How to repair certificate issues in Windows Small Business Server 2011, Windows Home Server 2011 and Windows Storage Server 2008 R2 Essentials (July 2011)
    - http://social.technet.microsoft.com/wiki/contents/articles/3940.aspx
  3. Default input language is set to English on the Spanish versions of Windows Small Business Server 2011 Essentials, Windows Home Server 2011, and Windows Storage Server 2008 R2 Essentials - http://support.microsoft.com/kb/2639424
  4. How to Change the Password Policy in Windows Small Business Server 2011 Essentials - http://social.technet.microsoft.com/wiki/contents/articles/6829.how-to-change-the-password-policy-in-windows-small-business-server-2011-essentials.aspx

Client Deployment

  1. Troubleshooting Client Deployment Issues when using Windows Small Business Server 2011, Windows Home Server 2011 and Windows Storage Server 2008 R2 Essentials (July 2011)
    http://social.technet.microsoft.com/wiki/contents/articles/3941.aspx

Remote Web Access

  1. Manually install existing SSL certificate into Small Business Server 2011 Essentials
    http://social.technet.microsoft.com/wiki/contents/articles/manually-install-existing-ssl-certificate-into-small-business-server-2011-essentials.aspx
  2. Remote Web Access Deployment Guidance - http://social.technet.microsoft.com/wiki/contents/articles/remote-web-access-deployment-guide.aspx

Media and Workgroup (Windows Server Storage Server 2008 R2 Essentials and WHS 2011 only)

  1. Media streaming known issue and workaround with Windows Home Server 2011 and Windows Storage Server 2008 R2 Essentials (August 2011)
    http://social.technet.microsoft.com/wiki/contents/articles/media-streaming-known-issue-and-workaround-with-windows-home-server-2011-and-windows-storage-server-2008-r2-essentials.aspx
  2. How to change workgroup name on Windows Home Server 2011 and Windows Storage Server 2011 R2 Essentials (August 2011)
    http://social.technet.microsoft.com/wiki/contents/articles/how-to-change-workgroup-name-on-windows-home-server-2011-and-windows-storage-server-2011-r2-essentials.aspx

Data Protection (Server and Client Backup)

  1. Server Backup FAQ (August 2011) -
    http://social.technet.microsoft.com/wiki/contents/articles/faq-for-windows-home-and-small-business-server-backup.aspx
  2. The "Recover your server wizard" crashes in Windows Small Business Server 2011 Essential, Windows Home Server 2011 or Windows Storage Server 2011 Essential
    - http://support.microsoft.com/kb/2639956
  3. How to fix the Server Backup Service exception "One or more services are not running” for SBS 2011 Essentials, WHS 2011 and WSS 2008 R2 Essentials -
    http://social.technet.microsoft.com/wiki/contents/articles/6828.how-to-fix-the-server-backup-service-exception-one-or-more-services-are-not-running-for-sbs-2011-essentials-whs-2011-and-wss-2008-r2-essentials.aspx

Office 365 integration

  1. Error message when an SBS 2011 Essentials user signs in to Office 365 after they change the password for their user account: "Microsoft Online Services ID or password is incorrect" - http://support.microsoft.com/kb/2652040
  2. The Office 365 Integration Module for SBS 2011 Essentials does not work as expected - http://support.microsoft.com/kb/2652021

Extensibility

  1. How to list your applications on Microsoft Pinpoint? How to make your applications discoverable - http://social.technet.microsoft.com/wiki/contents/articles/6886.listing-your-applications-for-discovery-in-microsoft-pinpoint-for-small-business-server-windows-home-server-and-windows-storage-server-2008-r2-essentials.aspx (Posted here last week)

Friday, January 20, 2012

Developers! How to List your Small Business Server and Windows home Server Apps on Microsoft Pinpoint

Are you a developer or developer firm that’s built an application for SBS 2011 Essentials, SBS 2011 Premium Add-on, Windows Storage Server 2008 R2 Essentials, and Windows Home Server 2011? Then you should list your application in Microsoft Pinpoint. Listing here will give you greater awareness of your application to your target audience.

For example, these links are inside the product:

Over on the Small Business Server Wiki, there is a how-to guide on how to go about doing this.  You can find that link here.

Before you can begin listing your applications:
  1. You must join the Microsoft Partner Network. Before you can begin listing your applications on Pinpoint, you must create an account with the Microsoft Partner Network (MPN) and create a descriptive overview for your company. It can take up to five business days for your new account to activate in Pinpoint after establishing your membership in the Microsoft Partner Network.
  2. Already a member? If so, then you can proceed to create your profile in Pinpoint. If you are already a partner but are not listed on Pinpoint and believe you should be, contact the Pinpoint team.

Microsoft Pinpoint

  • Sign-in using your MPN LiveID
  • Click on the Dashboard in the upper right hand corner
  • Click on Add or Edit Profiles in the nav bar
  • Click on the Apps + Services tab
  • Click the New button
  • Follow the rest of the wizard to create your listing
  • Wait for the application to be published in the marketplace

What are you waiting for? The complete guide is here, and you can jump to Pinpoint here.

Tuesday, January 17, 2012

How to Enable Auto-Logon for your Server

WARNING: This Post reduces the physical security of your server, leaving the server open for anyone for a brief period of time after reboot.

So, you are still reading after the warning above.  Excellent.  Unless you are physically controlling access to your server, and aren’t worried in the least about theft or any other loss of server, or access to server, then please continue reading.

Last year, I wrote a post about using my Home Server for more than just storage, backup and remote access.  This is not condoned by Microsoft or supported for Windows Home Server, as Windows Home Server licensing doesn’t enable you to run Line of Business Applications on your server, just security type applications.  This also depends on your EULA you’ve entered with your hardware OEM as well as Microsoft, so be careful you’re not voiding a warranty or locking yourself out of support here.  That might be more important to you than this little hack.  You should also see if your application can be run as a service, either by contacting the app provider, or by testing with the SRVANY.EXE command you can find from here. This wouldn’t reduce the security of your server, but still get you the end result.

Now that we’re through all the warnings, let’s get started.

I have some end-user applications that I want to run (as the different, non-admin user), that aren’t services.  This means that if the box reboots for patches, or a power-outage, the apps don’t start until I connect into the server and kick them off.  Naturally I put all the apps that need to start in the start-up group, this includes my iOS printing app, among others.  So ultimately I just need to log-in, and then I’m good to go. 

But… I can automate the logon with the System Internals (sysinternals). 

STEP 1: I simply download the AutoLogon tool.  When I launch it, I elevate it to the administrator account (ie UAC), and then accept the EULA.  I’m then presented with the simple UI:

Autologon - Sysinternals

I simply enter the username, domain and password I want to auto-login as, and hit enable. To disable this in the future, run the tool again and hit disable.image

STEP 2: This is the most important step, to secure things again.  It’s super simple, you simply enable the screensaver (I chose the “Blank” screen saver), and On resume, display logon screen is checked, and the screen saver will come on after 1 minute.

This of course will get irritating if you’re working on the server.  So in those cases I change the wait time up to 15 minutes, and then back down to 1 minute when I’m finished working.  I never turn off the screensaver, because if I forget to turn it back on, then the server will be indefinitely unlocked, which is bad of course. 

That’s all there is to it.  Use this wisely and only if needed.  You’d also be wise to see if your application can be turned into a service.  Microsoft has a tool for that too, it’s called SRVANY.EXE.

Tuesday, January 03, 2012

How to use your Home Server as an AirPrint server for only $10

As I move more and more of my computing and data to the Cloud with services like SkyDrive.  I am reducing the amount of computing power I have in my house.  I have an iPad (v1), a Laptop, and of course my Windows Home Server.

As I’ve mentioned before, I’m looking for more ways to take advantage of my low-powered Home Server to do more for me as an *always* on device.

Over the holiday’s we had a few visitors, which of course means printing boarding passes prior to leaving for the airport.  It was frustrating to have to take out the laptop when the iPad is just right there.  But without a compatible AirPrint printer, you can’t print from the iPad….

Or can’t you?FingerPrint

I found an application for Windows (and Mac OS) that installs on your computer that shares almost any printer connected to the computer, to the AirPrint service. 

There was an old version that doesn’t work with iOS5 that is free.  But obviously, I have iOS5 on all my devices, so that wasn’t an option.  I’m also not a big fan of Jail-Breaking (I guess I know too much about security to allow a hacker full access to my device).

This application, called FingerPrint by Collobos Software, will share out any connected printer, as well as DropBox locations to the AirPrint service.  I started with the trial to make sure it worked first.

To get it set up, I downloaded the FingerPrint installer, copied it to the desktop of my Home Server and installed it. Then of course ran FingerPrint on the server.  I also had to add my network printer to a printer on my Home Server, just by going to Control Panel and adding a printer as I normally would on any Windows machine.

However, it didn’t initially work.  I had to make two changes to the configuration for it to work, probably specific to my network.  I’ll share them here incase you have the same problems.

Enabling Multicast on my router

First, I discovered that my DLink DIR-655 router wasn’t allowing Apple’s discovery service, Bonjour.  This is not always the case with routers.  But I discovered that I can enable MultiCast, on the router, which seemed to allow it.  I did this on the DIR-655 by going to Advanced, then Advanced Network, and at the bottom, selecting to Enable Multicast Streams:

MultiCast Streams

This required a router reboot, which took down my network for 30 seconds, and then it took another approximately 5 minutes for my iPad to discover the services running.

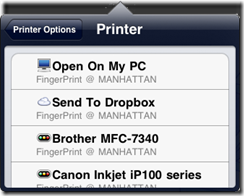
This enabled me to see the list of printers connect to my Home Server

Opening an Additional Port on the server

Per Collobos support page, I had to manually open the port 6631 on my Home Server to allow AirPrint to send the document to FingerPrint.  To do this I simply:

  1. Logged into the Home Server
  2. Clicked Start, then Run, and ran the wf.msc firewall configuration utility
  3. I clicked on New Rule
  4. In the wizard that opened, I selected Port, and clicked Next.
  5. The port is a TCP port which was the default, and I typed in the specific port of 6631
  6. I also chose to Allow the connection even if it’s unsecure (this might not be available in SBS 2011, in which case you’d also need to make a group policy change)
  7. On where does this rule apply, I ensured that it only apply to Private networks, meaning that I unchecked Domain (which doesn’t apply to WHS anyways) and Public. (Note for SBS 2011, you’d have to select Domain)
  8. Finally, I gave it a friendly name.  I used FingerPrint Port 6631 so I could easily find it in the list again if I ever wanted to remove FingerPrint, and clicked Finish.

At this point, the printing just started! woo hoo!  Of course I can play around with this for 7 days on trial, then I’ll have to get a license key for FingerPrint.

Additional Bonus!

As an additional bonus, you can manage all the documents printing from the Home Server’s print queue.  So I think it’s worth the $10 to be able to print directly from the iPad.  Plus Collobos has support if you ever get stuck.

As a final note, I have noticed that you don’t want your iPad to go to sleep before the print has happened, and it’s not exactly the fastest thing/

[Note: This is untested on Small Business Server 2011, but I don’t see why it wouldn’t work, changes are noted above, leave a comment if you try and have modifications]

Wednesday, November 16, 2011

Introducing a new line of Network Storage Servers for SMB

WD Sentinel DX4000

Only yesterday, a third product that I worked on over the past little while called Windows Storage Server 2008 R2 Essentials was announced, on hardware provided by Western Digital.

Windows Storage Server 2008 R2 Essentials is a mid-way point between Windows Home Server, and Windows Small Business Server 2011 Essentials.  And by in between, I mean you have a business class Home Server.  So you have media streaming, but no domain controller, and a limit of 25 users instead of 10 that Home Server has. 

One other unique feature it has is the ability to join a domain, that Windows Home Server does not have.  You can join any size domain, but limit (via AD security group) the number of users down to 25 who can use the NAS box.  You can only use it for up to 25 users.

This is a great solution if you want to add client backup to 25 clients on any SBS 2008 or SBS 2011 Standard networks, or just a standard server network.  Furthermore, it does have RWA with it, which means you can add an RWA solution to your standard server network if you want.

The WD Sentinel DX4000 looks pretty awesome from a hardware perspective as well.  You can jump on over to the Western Digital WD Sentinel DX4000 website to learn more.

Thursday, November 10, 2011

Home Server and SBS Add-in to Automate Client Backup of your MAC

One of the most popular posts on my blog is how to enable Apple’s Time Machine backup to backup to your Windows Home Server 2011 or Windows Small Business Server 2011 Essentials.  As it turns out, a company named Orbital Technologies has decided to build an add-in that enables this functionality without the need for you to walk through the steps of creating those confusing sparse files.

UWHS - Orbital Backup Configuration for MacThat add-in has been reviewed over on the famous UsingWindowsHomeServer blog, specifically in a blog post here, covering the preview of the Orbital Backup Configuration for Mac.  They additionally covered the add-in again when it was available.

Simply install the add-in, open up the dashboard on the MAC client and go to add-ins, Orbital utilities and follow along.  All you  need to know is your username and password to the server.  easy right? also free!

Keep in mind that you can still do the manual steps provided in my post if you prefer not to install anything as all this add-in does is the configuration pieces for you.

You can download the add-in directly from the Using Windows Home Server Forums, or We Got Served forums. The add-in should work fine on Windows Home Server 2011, Windows Small Business Server 2011 Essentials, and also Windows Storage Server 2008 R2 Essentials.  If you’re using any other Windows product, the manual steps are for you.

Friday, September 16, 2011

HP/Microsoft do an Extreme Make-Over of a Not For Profit Organization

Earlier this year, I had the pleasure to be able to participate in a very heart warming story.  Families For Effective Autism Treatment of Washington (or FEAT WA), was the first winner of the HP & Microsoft Extreme technical make-over.  FEAT really does a lot of work for children with autism, and were struggling with their hobbled together IT infrastructure. 

Microsoft and HP came together to set up the IT Infrastructure backbone running Microsoft Windows Small Business Server 2011 Essentials on a maxed out HP ProLiant MicroServer. And for the children and office workers, Microsoft Windows MultiPoint Server 2011 Premium on an HP ML 110 G7; to be connected to with the HP t5749e thing clients and HP EliteBook 8460p Notebooks. HP also improved their networking infrastructure with the HP ProCurve 1810G-24 switch.

It was so awesome to meet and help out Brenne and Amanda at FEAT of WA to do their job and help children with autism.  Check out the video:

Friday, August 26, 2011

Obtaining a Domain Name in SBS 2011 Standard and Essentials

So my second video that I did with the HP/Microsoft Coffee Coaching is now live. This one is near and dear to my heart as it’s a program that I built almost from the ground up (admittedly I had a little help from my friends at the start). I dive into the nuances of obtaining a domain name for your Remote Web Access website in these two products. The “Essentials” side of the fence also pertains to Windows Home Server (except in the view I talk about .remotewebaccess.com, where in WHS its .homeserver.com, but it works the same way)

Additionally, if you are interested in some corny video footage and want to learn a bit more about me, you can view my rather embarrassing bio video. I swear it didn’t feel this corny when I was filming.

Friday, July 29, 2011

Learn about how Multi-Point 2011 Premium works with SBS 2011 Essentials on HP/Microsoft Coffee Coaching

I managed to finally get my schedule coincided with the HP/Microsoft Coffee Coaching filming crew. When I was with them I managed to create my first video which talks about how awesome MultiPoint 2011 Premium server is when you have Small Business Server 2011 Essentials already running in your network (details here). Check it out, it’s only 6 minutes of your time.

Thursday, June 30, 2011

Using the new Office365 with SBS 2011 Essentials

Over on the Official SBS blog, they have a new post about how you can use Office365 with SBS 2011 for a better together story.

SBS 2011 was designed from the ground up to work with hosted versions of Exchange and SharePoint, such as Office365, or BPOS. But you don’t need to wait for any integration pieces to be in play, you can get started today. Check out these videos for more details:

What you can do Today

What you can do with the Office 365 integration module


Wednesday, June 29, 2011

The Basics of Local DNS for Small Business Server 2011 Essentials

[Post idea courtesy of Robert Pearman, MVP]

If you’ve used Windows Small Business Server in the past, you’ve probably figured out exactly how DNS works. With the SBS 2008 and SBS 2011 the Connect to the Internet Wizard would analyze your network and determine a static IP address to use, and then ensure you like it before making it the server’s IP address. Then as we all know, the DNS server runs on SBS and resolves local network addresses, like “domain.local” or “server” or the internal fully qualified domain (FQDN) “server.domain.local”

Since SBS 2008 and SBS 2011 are DHCP servers by default, that means they hand out IP addresses, and the server’s IP as the DNS server. DNS works flawlessly in such an environment. Internet based addresses (such as Microsoft.com) are first sent to the SBS box for resolution, and then forwarded on to the ISPs DNS servers for name resolution.

Ultimately SBS is a middle man in the peer to peer DNS infrastructure and gives the full power of DNS to the local network

So how is SBS 2011 Essentials Different?DNS!

SBS 2011 Essentials doesn’t assign itself a static IP address, and it doesn’t have a Connect to the Internet Wizard. Essentials will automatically connect to the Internet just like any client computer, using the DHCP assigned address. It does however use its local DNS server to resolve both local and Internet based names by overriding the DHCP assigned IP address to 127.0.0.1 (localhost). If you dig into the DNS settings, you’ll notice that the DNS Server picks up the routers IP as a forwarder. Routers by default will hand out their own IP as the DNS Server and proxy DNS out to the WAN configured (usually DHCP but sometimes services like OpenDNS) DNS servers. This means that if the server were to ask for an Internet based address, like technet.com, it would forward that request to the router, which would intern forward it to the ISP, which could hopefully resolve it for you.

Clients on the network also still need to use the SBS DNS Server in order for Active Directory to work, or to resolve the server and other services on the network (for example, client backup doesn’t work unless DNS is operating correctly). Clients *also* get their IP and DNS Server from the DHCP server, which in Essentials, by default, is the router. This means that the DNS server is the router, essentially skipping the SBS name resolution step. Once the client goes to http://server/connect, a service is installed called LAN Configuration Service. This service monitors client IP address changes, when the client gets a new IP (ie, it turns on, or it changes locations) it immediately sends out a UPnP query looking for the server (note, this only works on single subnet environments). If a server is found, the DHCP assigned DNS address is overwritten by the server’s IP address (obtained in the return call from UPnP). If no server is found, the DHCP DNS assigned address is kept.

This means that client computers get the SBS DNS address within the SBS network, but the DHCP assigned address at a place like StarBucks. Clients can always resolve the Internet, and inside of the SBS network, they can also resolve the SBS server and Active Directory domain.

Now, for those paying attention, you’ll have recalled that the SBS server’s address is also DHCP assigned, which means it can change if the router deems it necessary. There is a similar service on the SBS server that will broadcast when it’s IP address changes, the clients on the network pick this up and update DNS, the clients off the network will just re-do the process above to get the right IP address.

A side-effect/pro of this design over the SBS 2008 or 2011 Standard design is that if the server is down for patching (we all know how long those reboots take), or another reason, the client will revert back to the DHCP assigned address after a short period of time and can continue to resolve the Internet until the server comes back online.

Can I set things up the old way?

Of course you can. SBS 2011 Essentials is still a full blow copy of server, and all the power that you’re familiar with is there. You can just jump into the NIC settings on the server and give it a static IP address of your choice. No problems there.

Additionally, if you absolutely wanted to run DHCP on the SBS Essentials server, no problems there either, simply open up the Server Manager, install the roll and configure DHCP. Don’t forget to turn off DHCP on your router, and away you go. If you’re not familiar with DHCP settings though, I suggest you leave it the way it was.

Friday, June 17, 2011

How to Manually Configure SBS 2011 Essentials Internet Domain Name

Back in SBS 2003 timeframe, having an Internet domain name for remote access to your server started to become more and more essential. With the SBS 2008 product, we added the ability to work with domain partners directly inside of the product to obtain that domain name, and also configure it. This same methodology was moved to SBS 2011 Standard product, and with the birth of Essentials, only later this year, we added the ability to also get your SSL Certificate as part of this process. Moving away from the self-issued certificate, which while can be configured correctly to work, causes a lot of work pushing the root certificate around to all the remote PCs and devices that possible connect to the server.

I believe the best path to success for you is to have your domain with one of our domain partners, because the alerts are integrated, and the solution is simple to set up, and you don’t need any additional components like 3rd party Dynamic DNS clients or static IP addresses from your Internet Service Provider (ISP). It’s a built in Dynamic DNS client, that’s been completely tested by both our 3rd party vendors as well as the Microsoft test team.

However, if you must manually configure your domain name, In SBS 2011 Essentials, the path of manually configuring your domain name is more hidden, and I wanted to share with you how to do this. First off, your domain name cannot be with GoDaddy or eNom if you want to manually configure your domain name. We optimize for the automated cases as mentioned above. So let’s get started in manually configuring our domain name.

  1. Open the Server Dashboard and click on the Server Settings link
  2. On the Remote Web Access tab, select Turn On

Server Settings

  1. Choose to configure the router, or skip the router configuration. If your router does not support the UPnP based configuration protocol, or you have and want UPnP disabled; it’s recommended that you skip the router configuration. If this is the case, you should
    1. Create a DHCP reservation for your server in your router’s DHCP server (or other DHCP server on the network) such that your server gets the same IP address every time.
    2. Open at a minimum port 443 from the Internet to the router using the TCP protocol (UDP is not needed). If you do not wish to educate users to type in https://, then you should also open port 80 to the same internal IP address. The server will automatically redirect http:// requests to the secured by SSL https:// URLs
  2. When you have finished the router configuration portion of remote access, you should choose to Set up your domain name.
  3. Click Next on the Getting started page of the wizard
  4. When manually configuring a domain name, the server assumes you already own it. Thus in the Do you own a domain name page of the wizard, select I want to use a domain I already own and type in the name of the domain, eg. Contoso.com.
    1. Note: if your domain name is with eNom Central or GoDaddy, you’ll be asked to use that service instead of manually configuring your domain name.
  5. On the following page, select Set up my domain name manually, and click Next.
  6. On the following page, you will be shown a help topic on how to set up your domain name manually by clicking the I want to set up my domain name manually link.
  7. Outside of the wizard, to setup your domain name, you’ll have to log into your domain name provider and make the following changes:
    1. Create an A record called “remote” (if you choose to use remote.contoso.com) that points to the static IP address of your server
    2. Ensure that your IP address from your ISV is static (doesn’t change). If this is not an option, you can look into a 3rd party dynamic DNS solution and ensure that that’s updated. If you go with the Dynamic DNS option, then (a) above should probably be a CNAME to the URL provided by the Dynamic DNS company.
  8. Once you have completed the above step, confirm that your domain is set up, check the box and click Next.
  9. Next you will need to have a certificate for your domain name. This certificate will secure web traffic to your domain. It’s VERY important that the certificate name (remote.contoso.com) matches the A record you created above. Without a match, your users will get a certificate warning (you can change the “remote” using the Advanced button:

Set up a Trusted SSL Certificate

  1. This generates a certificate request. You’ll have to find a certificate provider (Both GoDaddy and eNom Central offer low cost certificates for use) and follow their instructions on how to get a certificate. They will need the certificate request string shown in the wizard below. To copy this into a webpage, simply press the Copy button and paste it into the certificate providers webpage when asked.

Generate a certificate request

  1. Most inexpensive certificates are issued immediately, but if you live in a country that doesn’t do this, or you purchased a higher end certificate, you might have to wait. I do want to take a second and tell you that yes, you do only need the cheapest of certificates. The SBS team has gone to a great deal of effort to ensure that you only need the cheapest security aspect, with no multi-name or wildcard certificates needed. If you choose to upgrade, it should be for another reason than those mentioned. So if your provider needs more time, just tell the wizard and follow the instructions

SSL Certificate request in progress

  1. Once you have the certificate string, or file, you’ll have to import that into the server using the next page of the wizard:

Import the trusted certificate

  1. Now you’re finished, and your domain name is set up.

You know you’re correct when on a computer outside of your network you type in NSLOOKUP remote.contoso.com (replacing your domain name here) and it returns the static IP address of the external IP of the router (the one your ISP gives you), and that when you browse to http://remote.contoso.com/remote, that you don’t get a certificate warning when the logon page comes up. This ensures you have both the router port 443 forwarded correctly, and that the certificate is installed correctly. Additionally, all the errors in your dashboard should disappear, if they were there in the first place (this can take up to 30 minutes for these alerts to clear)

That’s all there is to it!

Thursday, June 16, 2011

SMB MVP Community Roadshow

HP and Microsoft have joined together with our Most Valuable Professionals (MVPs) to visit 66 cities in Canada, Australia, Europe and of course the United States.  They are touting it as a real-world experience and advice talk by the MVPs who live and breath the product ever day.  No marketing talk!

Kevin and Dana give it to you straight.

Kevin Beares and Dana Epp talk about SMB MVP Community Roadshow

These guys brought down the house in Vancouver, BC tonight.  Tomorrow night they hit up Victoria, BC.  Then are out to talk to you, in the rest of the world!

Register for the roadshow nearest you

Tuesday, June 14, 2011

Windows Phone 7 Add-in for SBS 2011 Essentials and WHS 2011 (Release Candidate)

Today the Release Candidate of the Windows Server Solutions Phone Connector for Small Business Server 2011 Essentials (aka Integrating Windows Phone 7 with your SBS 2011 Essentials Server) is available

clip_image001

The purpose of this Add-in is to enable Remote Server Management tasks for SBS 2011 Essentials including

Alerts

After you complete the authentication steps with the server that you are trying to connect to, an alerts listing is the first panorama item that the application launches into. This feature brings the Alert Viewer that you know from the server, to the phone.

If an alert is displayed white, it is active and included in the alert count. If an alert is dimmed, that means the alert is disabled, and it is not included in the alert count. Any alert item can be clicked to view the full alert text just as on a computer. Contextual menu options include enabling or disabling an alert, and performing a repair action if one was assigned to this alert.

Users

The user-panorama item performs basic user management tasks, including:

  • Viewing user account details
  • Enable or disable a user account
  • Change a user account password

If you disable a user account, that is a reversible action. The moment a user account gets disabled, it causes the same effect as it would if you disable it by using the dashboard. The user’s access to Remote Web Access, the phone application, and any server resources is turned off.

Devices

“Devices” is a panorama item that lets you:

  • View server-joined computer and Mac details.
  • View the backup status that every device last reported to the server.
  • Start or stop a backup for any computer or the server (from the contextual menu).

Live Tile Support

clip_image002
If you pin the application to the home screen of your Windows Phone 7, you will be able to see a variety of at-a-glance information without launching into the application. An opt-in using the settings menu is required.

The at-a-glance information includes:

  • Count and type of network health alerts.
  • Percentage of storage use of your main disk.
  • Server name sending this information.

The Windows Phone 7 application requires both a server sided add-in to be installed on the SBS 2011 Essentials Server, as well as Windows 7 Phone application downloadable via marketplace.

If you end up getting the Windows Home Server version, you’ll also get live media streaming

Media Support (Home Server Only)

The Media panorama lets you discover and view streams of media elements that you stored on your server in the appropriate shared folders (such as Music, Video and Picture shares).

clip_image010Music

MP3 non-Digital Rights Management-protected songs will be streamed directly from the server to your phone. Album art is also transported. Your library is searchable and can be organized in different views to help find what you want fast.


clip_image012Pictures

“Pictures” has a variety of functions:

  • Discover all .png and .jpg images that are stored in the Pictures shared folder on the server. Subfolders are recognized.
  • Open a picture full-screen to view it on the phone.
  • Save a copy of the picture to the phone, using its original dimensions and resolution  (to be viewed later in the built-in Pictures hub of any Windows Phone 7).
  • Take a picture with the phone’s camera and upload it to the server.
  • Upload any picture that is stored in the Pictures hub of the phone to the server.

clip_image014Videos

The “Videos” feature allows you to discover and view videos that are stored on your server in the Videos shared folder.

Even though discoverable by this feature, the variety of video formats is high and not all formats can be streamed. For details about which video formats can be streamed from the server and accepted by the phone, see Supported Media Codecs for Windows Phone.


For further information, and access to the downloads to start testing today please visit the SBS Connect Site, or WHS Connect site depending on your product.

Please note this is a release candidate and as such is for testing purposes only.  Link Back to the Official SBS Blog Post.

Monday, May 30, 2011

Finding and Listing Add-ins for Small Business Server Essentials

Microsoft PinPoint

Finding Add-ins for Small Business Server Essentials

If you’re looking how you can extend your SBS Essentials software with add-ins designed specifically for the SBS space, then you want to point your browser over at the Microsoft Website to find the SBS Partners.  This allows you to find applications for all the versions of SBS, but to get right into the add-ins for SBS Essentials, you can skip a click and jump right to the PinPoint directory.  PinPoint is an online Marketplace for Microsoft that you can use to find services or software that suite your business.  Simply go here and you can search for the software you want.  Note that WHS 2011 and SBS 2011 Essentials share the same SDK.  As a result you see both SBS and WHS items listed here.

Listing your Add-in in the PinPoint directory

So you’re an Independent Software Vendor (ISV) and you want to list your add-in in the PinPoint directory? that’s pretty easy too.  Before starting you first need to:

  1. Join the Microsoft Partner Network. Before you can begin listing your applications
    on Pinpoint, you must create an account with the Microsoft Partner Network (MPN) and create a descriptive overview for your company. It can take up to five business days for your new account to activate in Pinpoint after establishing your membership in the Microsoft Partner Network.
  2. If you are already a member, or have finished the step above, the next stop is to create your PinPoint profile.

Once you are a Microsoft Partner and have a PinPoint profile, you can being to list your application for discovery by customers world wide.  This this process is 8 steps and you can save as you go!

To get started, download this handy PDF guide.

Friday, May 20, 2011

Can Small Businesses use Windows MultiPoint Server? Yes, Yes they can!

Yours Truly (Sean Daniel) talking about MultiPoint

Varvid‘s Aaron Booker caught up with influential blogger and Microsoft SBS Program Manager Sean Daniel to discuss how Multipoint‘s traditionally education-focused offering can also work well for small- to medium-sized businesses. Multipoint is big on universal connectivity, emphasizing ease-of-use without the need for much training. To learn more about Multipoint, go to http://microsoft.com/multipoint.

Wednesday, May 18, 2011

Windows Small Business Server Essentials 2011 on TechNet Edge

[Video]

Key items talked about in the interview:

  • SBS 2011 Essentials on an HP Proliant Microserver for under $1000, 25 CALs included
  • Scale for greater users to an ML110
  • All the simplicity of Windows SBS 2011 Essentials on simple hardware

Tuesday, May 17, 2011

Looking to Migrate to Small Business Server 2011?

If you’re looking to migrate to Windows Small Business Server 2011, and aren’t completely sure where to get started, you have your choice of migration options from Microsoft. 

The migration solutions provided are well documented and tested by Microsoft, but do require extra hardware, and do require you to change the computer name of your server.  Additionally, these migration whitepapers are free of charge for you to use.

There are other solutions that you can choose such as the Swing Migration, which at an additional fee you can get a customized migration paper, and access to the Swing migration forums.  Both are valuable resources and you need to determine which is best for your customer’s business.  Both solutions get you from point A to point B, the better place on SBS 2011 Essentials or Standard