Showing posts with label NAS. Show all posts

Wednesday, November 16, 2011

Introducing a new line of Network Storage Servers for SMB

WD Sentinel DX4000

Only yesterday, a third product that I worked on over the past little while called Windows Storage Server 2008 R2 Essentials was announced, on hardware provided by Western Digital.

Windows Storage Server 2008 R2 Essentials is a mid-way point between Windows Home Server, and Windows Small Business Server 2011 Essentials.  And by in between, I mean you have a business class Home Server.  So you have media streaming, but no domain controller, and a limit of 25 users instead of 10 that Home Server has. 

One other unique feature it has is the ability to join a domain, that Windows Home Server does not have.  You can join any size domain, but limit (via AD security group) the number of users down to 25 who can use the NAS box.  You can only use it for up to 25 users.

This is a great solution if you want to add client backup to 25 clients on any SBS 2008 or SBS 2011 Standard networks, or just a standard server network.  Furthermore, it does have RWA with it, which means you can add an RWA solution to your standard server network if you want.

The WD Sentinel DX4000 looks pretty awesome from a hardware perspective as well.  You can jump on over to the Western Digital WD Sentinel DX4000 website to learn more.

Friday, March 18, 2011

Going “Pro” using Proxure’s KeepVault Pro for Windows Home Server 2011

If you read my post from Tuesday of this week, on using Proxure’s KeepVault for Windows Home Server 2011 or Windows Small Business Server 2011, and when you got to the bottom, you thought to yourself.  Heck yeah I’m going Pro! Then this I post is for you. 

If you are running Windows Small Business Server 2011 Essentials, then this post will simply show you the features before you buy, because you had to get KeepVault’s pro version for your version of Windows Small Business Server. 

First, the upgrade process: If you have Windows Home Server 2011, and you’ve been enjoying the standard features KeepVault has to offer, but want to upgrade because one or more features in my previous blog post were appealing, here is how you do it:

  1. From the Launchpad, click on the Dashboard link and type in your Home Server Password to load up the Dashboard.
  2. Navigate to the KeepVault tab already installed in your Dashboard
  3. On the My Online Backup Job tab, click the link your account name.  For me it’s my email address to go to KeepVault’s website.
  4. Log into KeepVault’s website (you’ll need that subscription ID again) and follow the instructions to upgrade to Professional.
  5. Now you have to make the software aware that you’re running pro.  I remembered that the “Restore Files” link had an upgrade option, so I used that: Upgrade KeepVault Backup for Windows Home Server
  6. Since I already did the upgrade on the web, I just clicked Apply Upgrade, but you could also skip the first few steps and  have the Purchase Upgrade take you to KeepVault’s website.  When you’re finished upgrading the back end, you get this: Welcome to KeepVault Backup Pro
  7. Wow, I don’t even have to close the File Recovery wizard, I instantly have another option to selectively download from other computers I might backup. Selective Download
  8. I cancelled the above wizard, and I’m still in KeepVault Pro

You’ll now notice little changes throughout the UI like the above recovery option, for example, if you flip over to the My Local Backup Job tab, you’ll see in the drop down list that you can add a network drive to backup locally to:

Add a Network Drive ...

Sub Users and roaming backups

In addition, the Pro account now gives me access to add “Sub Users”.  Brilliant!  So now I can just install the Windows 7 version of KeepVault on my wife’s computer, and have her files and folders backed up directly to the cloud while she roams around with her laptop.  Or better yet, in Windows Small Business Server 2011, you often have roaming sales people or people who are away from the office for long periods of time (perhaps even satellite offices?) you can simply install KeepVault on their PC, sign them up as a sub-account and have them back up directly to the cloud.  Need a file from them? Then simply restore it to the server. 

Adding a Sub User Account

Accessing your Backup through the Web Portal

When you click on your account name (in my case my email address) in the My Online Backup Job and log in with your subscription ID, you can click on the Web Access tab.  It’ll prompt you for a web access password (I skipped this because I was so excited about Sub Users, If you’re like me, simply disable web access and enable web access and it will prompt you again).  Once you have your password in place, you can click the Open Now web link to jump right into your online backup.

Web Access Tab

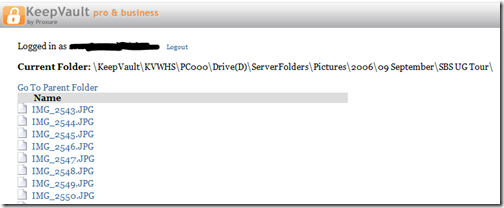
If you don’t want to log in with your Subscription ID, there is a quick jump to http://web.keepvault.com, which will jump you right to your web view of your backup.  Which by the way is raging fast, even though it’s reading encrypted files.  For example, if I wanted to download files from my 2006 User SBS Group Tour, I can simply browse to the folder, click the file and download:

KeepVault Backup Web Access

Retention Policy

As mentioned in my previous post on KeepVault, you also get a retention policy of 5 versions of files.  To restore previous versions of the files, simply do a Selective Restore, and when you get to the file, right-click it and choose the version of the file you want.  If there is no context menu, you only have one version (the latest) backed up.

From the Web Access, if you click on a file (screenshot above), you see all the versions of the file available to download.  You should keep in mind the following:

  • If you delete a protected file from KeepVault, it deletes all versions
  • File versions younger than 48 hours are never deleted (if you save a word document 10 times for example in the same day and backup is configured to “automatic”
  • The oldest 5 versions of a file are pruned (read recovered storage space) after the 10th version of a file is successfully uploaded

So as it turns out, it’s pretty easy to go Pro, if that suites you, and Small Business Owners, now you have details of all the Power Pro gives you at your finger-tips.

Tuesday, March 15, 2011

Online Backup using Proxure’s KeepVault for Windows Home Server 2011 and Windows Small Business Server 2011

As I’ve mentioned before, being a photographer, my photos are my most critical piece of data that lives on my Home Server.  When using Windows Home Server v1, I had found an Online Backup solution that I previously reviewed on this blog.  While I still think it’s a good solution, it has some draw-backs depending on the Amazon S3 back-end.  Like the cost of Amazon S3 is about as expensive as it gets, and signing up for Amazon S3 was probably one of the more confusing processes I have ever done.

While at SMB Nation 2010 in Las Vegas, I had ran into a company called Proxure who build a solution called KeepVault.  I watched a demo of their solution run and it seemed reasonable, at least to check out.  I thought it was pretty cool that they offer versions for Windows XP, Vista, Windows 7, Standard Server (03 & 08 via their Professional version), and most importantly for me: Windows Home Server.

KeepVault Add-In

While this blog covers KeepVault on Windows Home Server 2011 (codename “Vail),  the same add-in offers cloud storage to both the Windows Small Business Server 2011 Essentials (codename “Aurora”) and the Windows Storage Server 2008 R2 Essentials.  However, for these business products, you need to get KeepVault Pro.  The steps and UI, aside from the color of the dashboard, is identical.  KeepVault Pro can also be used on Windows Small Business Server 2011 Standard (codename “SBS7”), although that UI is not shown in this blog post.

Back to the review: The first thing I notice was KeepVault doesn’t bill you for what you use, they bill you for storage space in chunks (40Gb, 80GB, 130GB, 200GB … 3.5TB!).  So if you’re only backing up a very small amount of data, you could end up over paying, but if you compare to Amazon’s 15cents/GB (up to the first TB), you really see a cross over at about 15GB.  Once you get over 15GB, Proxure seems to win hands down on cost.  Plus when you hit the top mark, you click a link and you can bump up your storage. 

The Setup Process

Using the AWIECO Drive Info add-in, I determined I wanted to back up my Pictures and Documents, the things that I really care about.  That came out to about 117GB, so I signed up for the 130GB plan from Proxure.  You don’t need the AWIECO add-in, but it made it a “glance” to compute.

Installing the add-in is just as painless as installing any add-in.  Just double click on it on the server, or on any server-joined client, read and accept the EULA, and then Install it.  You’ll have to re-start the Dashboard to have it appear in the global tabs.

Proxure KeepVault Add-In

The initial page doesn’t look intimidating at all.  Simply click on the Order a KeepVault Backup for Windows Home Server Subscription Now button and sign up. I thought it was pretty slick you could pay via PayPal or with a standard credit card. I’m all for yearly payments too, so I got to save my 10%!! Within 5 minutes I was emailed my subscription ID. Typing that in, with my email ID and I’m good to go.

Choosing an encryption key I can type one in myself, or KeepVault will randomly generate one for me.  If you generate one yourself, you have a risk that you forget your key and now your cloud backup is useless.  If you’re like me, you’ve installed WHS 2011 on new hardware and it’s probably a while before that fails, so you might forget it.  If you don’t want this cumbersome task, you can let KeepVault choose one for you.  The interesting thing here is that they generate the key based on your ID and subscription numbers (as its computer agnostic).  To me that means that someone at KeepVault *could* decrypt your backup.  Although my suspicion here is that you are still safe because our data is stored in blobs and because KeepVault has more than one customer, it’ll be hard for the lay-man IT person at KeepVault to match this up to your backup.  For what it’s worth, I went with “Let KeepVault choose one for me”.

I like how KeepVault really focused on the simplicity of the solution.  With the previous solution I reviewed I could create multiple backup jobs and multiple schedules, which was nice, because parts of my collection barely every change, I just wanted them backed up.  But it was overwhelming at first.  KeepVault’s “Always/Real Time” schedule by default and the single “Job” configuration removes any daunting thoughts you might have.  The only confusion on the whole page for me was enabling the protection on the shares.  I didn’t realize the grey bar across the page were actually buttons, as most of the WHS 2011 console they are just “headers” of columns.  So once you realize that you can just click on Enable Protection to add that shared folder to the cloud backup, it was all good.  As any good add-in, you can also right-click on a Share in the list and select to enable or disable it from the context menu.

Enable Protection for Shared Folders

Using the Add button you can also add any folder you wish on the system, so it doesn’t have to be shared out to the network in order for you to back it up.  You’ll also notice in the screenshot above that I have changed the schedule to be between midnight and 6am.  This is because I am uploading 115GB of data, and I work from home, so from 8am-6pm I use my bandwidth for work, and from 6pm-midnight, I use it for entertainment.  By default, KeepVault will Encrypt and Compress your data on the box before it sends it over the wire.  Nifty…

KeepVault Job and Setting Options

The only feature that I think is missing from the Job scheduler is the ability to run 24/7 but use less bandwidth during the day, and all of it at night.

Looking at the other options, you can always pause the backup, view and delete your protected files online (ie. if you want to permanently delete some files, you can delete the file locally, and use this task to delete it from the cloud as well), view the protection/upload history, configure a proxy if your ISP requires one, and most importantly (the reason we all do backups), Recover Files.

The Event Log is KeepVault’s own list of events (like service start/stop, etc events).  Messaging (while somewhat confusing of a name, maybe “Job Notifications” or “Job Alerts” might be better, is actually really well done.  You can receive emails or SMS alerts (via your carriers E-Mail to SMS service) based on your backup failure rates.  KeepVault obviously has some mail service on the back-end that they allow you access too, because unlike the WHS 2011 Built-in Alerts, they don’t ask you to configure an SMTP service.

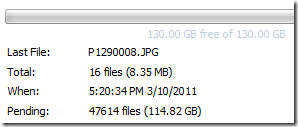
When the backup eventually kicks off, if you’re backing up as much data as I am, even with the 1900kbps as advertised in my standard version of KeepVault, I’m in for a long wait…  This is the same with every cloud solution the first time you back-up.  The progress is good, you get both global progress as well as file level progress

Global Progress of Upload

From 5pm to 9am (~16 hours) on a Thursday night over my cable connection, I backed up 5.1GB to KeepVault’s cloud.  Not quite as fast as the Amazon S3 solution, but then again, I don’t have a Pro account with KeepVault.

Once your data is uploaded, it lives in Proxure’s Data-Center, encrypted for only you to download in the event of a disaster.  Fingers crossed that this is just an insurance policy, and never used.

KeepVault Local Backup

You may have noticed in the above screenshots there was another sub-tab called My Local Backup Job.  Yes, KeepVault can back up to a local disk.  In the Standard version, it’s similar to the built in WHS 2011 Backup in the fact that it can only backup to hard drives attached to the system (the recommendation is still for USB for offsite storage).  If you have KeepVault’s Premium version, you can also back up to SMB Share (i.e. \\NAS\Share), so if you have another device on your network, you can back up to another share on your network.

Also, you’ll notice that this tab also allows you to compress or encrypt.  So if you’re taking that disk offsite, the encryption piece might be something you want to consider for safe storage of that disk should it be compromised.  If you don’t encrypt it.  Files are stored in “explorer friendly” format so a restore on any computer without KeepVault installed is possible.  In comparison, WHS 2011 backup is stored in VHD format, which requires you to first mount the VHD before you can actually do the restore of files.

Recovery of Files

File Recovery

The One-Click Recovery, really is just that.  Let’s say that you have a little child at home, and their favorite past time was to go into your prized photo library and use the delete button, just randomly through your collection.  Or maybe you were searching for your favorite files, and then miss-clicked and deleted your favorite files across your 100GB collection.  Restoring that can be painful.  This One-Click Recovery makes that a breeze.  As *soon* as you click next (i.e., one click), the service will compare the cloud to the local box, and recover all missing files.  If the file exists, the restore will be skipped, preferring the local file over a recovery.  So you can recover all those files our child deleted randomly, yes with one-click.  Obviously this is how you would go on a new server, because none of the files exist.

Selective File Recovery DialogThe Selective Recovery is more of the natural way we think about recovering.  You get your standard tree-view and you can drill into your cloud backup and select different files to recover.

This way is not a single-click restore, but a selective restore.  On the left-hand side if you select a folder, you can select files and folders on the right-hand side for restore.  So if you’re restoring a whole folder, select the folder above it, and then check the box next to the folder you want to restore. If you’re restoring all but a few files in a folder, that can take a few extra clicks.  Thankfully you can use the CTRL or SHIFT Keys to multi-select as you need (similar to Windows Explorer). Before moving on, you need to select if you want to over-write existing files.  This was weird to see on this dialog, because I figured it would be a sub-option on the recovery location which is next.

Once you’re comfortable with the set of files you’re going to restore (and if you want to over-write files), you next choose if you want to restore the files to the original location, or another location.  Unless I’m restoring a completely new server, I’d probably always choose another location to make sure that I’m getting what I expected.  Once you’ve chosen the folder for the location of the restore, I hit “Recover”, and just wait for the software to download the files and put them in the appropriate place.

Recovery Progress

The restore is in fact pretty painless, and yes, my photos came down in-tact…

Test Restore Thumbnail View

Why Go Pro?

As you saw above, KeepVault has two versions, Standard (which they just call “KeepVault”) and Professional (or “KeepVault Pro”).  As a home user, you  might not ever need the Pro version, but it’s certainly something you need for businesses.  So what do you get if you go Pro?

  • Support for Server solutions (aside from the WHS).  For example, the Windows Small Business Server 2011 Essentials, Standard and Windows Storage Server 2008 R2 Essentials.  Also, if you have additional servers in your environment, you can back them up to the same account (Standard Server 2008 and Standard Server 2003).
  • A much faster upload rate (5250kbps instead of 1900kbps).  This comes in handy with that first backup.  The faster you get the files to the cloud, the sooner you are protected!
  • Local Backup to UNC share.  Meaning you can back up your server to a local server share as well.
  • Higher encryption levels (256-bit encryption can be chosen instead of 128-bit)
    • This reminds me.  If you backup a file with the pro version, and then downgrade, your standard client can’t understand the 256-bit encryption and thus can’t restore the files.  It does work the other way around though.  So just be careful which way you go!
  • More Access to your data (Web Access, cross device access for restore) and other administration features.  Notice my screenshot under “Restore” above, if I had the pro version, I could backup files and folders from other computers, right to this single computer.  This means I could support cloud backup on my client computers, and then restore this to the server in the event that the client was dropped while out on a trip!  Another brilliant business feature.
  • If you’re using a management solution, error notification includes system events, so you can track errors in your online backup with your monitoring tools.
  • 5 version retention policy.  If you are with KeepVault standard, you only have the latest version stored on the internet, with Pro it keeps up to 5 versions so you can go back in time when you wish to restore.

As a business user, you’ll have to use the Professional version to get the add-in installed.  As a Home User, you should review the features above and gauge how critical they will be for you. 

If you’re still debating having a Cloud Backup solution for your most prized data, you should approach it like an insurance plan.  You have one for your house, you have one for your car.  You cross your fingers every day that you don’t need to use it, but when you do, it’s there for you.  If your hard-drive fails, recovery of such drives can often cost $1,000s, with no guarantee you can get your data back.  If you’re house burns down, like my uncle’s, this sort of thing is priceless.

I’m using KeepVault, what are you using?

UPDATE: Want to learn more about KeepVault Pro? Check out my Going Pro with Proxure’s KeepVault blog post.

Thursday, February 10, 2011

How to Enable TimeMachine Backup for your MAC to your Windows Small Business Server 2011 Essentials or Windows Home Server 2011

Well, I don’t often dabble around with a MAC, I just can’t get used to the single mouse button and pressing a key on the keyboard for a simple context menu.  I’ve quite possibly been assimilated to Windows.  However,  protecting your data is important, even if you are on a right-click less product.

As you probably know by now, the Release Candidate of both Windows Small Business Server 2011 Essentials, and Windows Home Server 2011 is now live. Which means you can download and install them!!  You should take a moment and do that now.  I’ll wait.

Once you have these installed, you can easily add your Windows based PC to the server and to the PC backup by simply going to http://server/connect on your client PC.  Click the install for Windows PC button and follow the instructions.  Windows PC’s are automatically added to the backup which takes place in a round robin style nightly.  When you’re on a Mac, it’s the same thing, but you click “Install for Mac”, you end up with a launch pad and access to the server, but no default backup.

It has to be possible right? I mean everyone knows that a MAC is really a *nix box with a really fancy UI (and no right-click).

Poking around on the Internet, you can find some steps, like how to get unsupported volumes to appear to the TimeMachine engine, with the help of a friend (thanks Fabian & Craig) we’ve managed to put together these steps, which work for both Home Server 2011, and SBS 2011 Essentials:

  1. First, create an SMB share on your server using the share permissions wizard, let’s call it Mac Backups.  Make sure the users who are on a Mac have Read/Write access.
  2. Change the Mac TimeMachine to show unsupported Network Volumes by going to Finder, then Applications, Utilities, Terminal.
  3. Inside the Terminal, type this command defaults write com.apple.systempreferences TMShowUnsupportedNetworkVolumes 1.  This sets the showing of unsupported network volumes to TRUE.

 Showing Unsupported Network Volumes

  1. Obtain the MAC’s MAC Address. A MAC Address is the hardware address of the local network card.  It’s important to choose the MAC address of the built in wired connection.  To obtain this, you can run the command from the terminal: ifconfig | grep en0.

 Finding the MAC Address

  1. Next (and this is the confusing part, so bare with me) we need to create a sparse file on the MAC and copy the server share.  A sparse file is a file that you define a CAP size, but it will probably take up much less (we’ll define it as 200GB in this example).  This file creation process is a little tricky.  To do this, type in to the same terminal above: command ‘hdiutil create –size 200g –fs HFS+J –volname “<CLIENT_NAME> Backup” <CLIENT_NAME>_<MAC_ADDRESS>.sparsebundle’ Where the MAC client is called <CLIENT_NAME> and the MAC Address on the primary wired connection to the MAC is <MAC_ADDRESS>.  This means if you’re client name was OSX, and your MAC address is 00:00:1F:12:82:92, then your command would be: command ‘hdiutil create –size 200g –fs HFS+J –volname “OSX Backup”  OSD_00001F128292.sparsebundle’  .  Here is what it looks like this client is called “macmini2” and has a MAC address of 34:15:9E:09:00:94


Sparse File Created

  1. Copy this file to “\\SERVER\Mac Backups\” that you created earlier on the server. As you probably know if you are a MAC user, you have to mount the volume:

 Mount the Server Share on the MAC

  1. Load up the Time Machine settings from within System Preferences, and the sparse file you created above should be in the list.  Select this as the target for your backups.  This will have every TimeMachine backup backup directly to a share on the server:

 Configuring TimeMachine to use the sparse file

  1. Repeat for all your Mac computers on your network.

Once you have completed these steps, your MAC will start using the Windows Home Server 2011 or Windows Small Business Server 2011 Essentials as the backup TARGET.  This means it will back up over the network using the built in timeline functionality, on the schedule you define inside timeline.

What is also cool, is while the MAC won’t show a percentage complete like the PC does when performing the client backup, it will tell you the status right in the console, which of course falls through to the alerts.

Mac Backup Successful:

Mac Backup Successful

Mac Backup Unsuccessful:

Mac Backup Unsuccessful

So there you have it, How to backup a MAC to a Windows Home Server 2011 (aka Vail) or Windows Small Business Server 2011 Essentials (aka Aurora) Server.

For reference, here is the team reference for WHS v1

Saturday, February 05, 2011

Why I plan on using the new Windows Home Server 2011

I’m sure you have heard by now, that the Release Candidate of the new Windows Home Server 2011 is available for download. It’s a huge milestone, and I’m excited for the final RTM sometime the first half of this year!

Windows Home Server 2011

There has been a lot of negativity around upgrading to the Windows Home Server (version 1) product, to the Windows Home Server 2011 or even using it at all, all due to the Drive Extender removal. I do understand the pain. I do. But I don’t understand why people instantly now hate WHS????

Looking back, we remember that Drive Extender had some initial problems after the v1 release. Some corner case of editing large files that lived on the server, in some rare cases, these large files were corrupt, people wanted to turn Drive Extender off, it scared them. After Power Pack 1 came in to save the day, only then did people start to trust Drive Extender, and yes, they immediately fell in love with it. Easy drive extension with a side benefit of duplicating files on multiple hard drives (“dup ‘em if you got ‘em!”).

Removing DE was a very tough decision, but I ultimately agree with the decision given what I know.

But without drive extender, is the product not awesome? is your data not safe? This blog post is intended to tell you why I think WHS 2011 is still awesome, and still keeps my data safe. I am a new father (she’s 8 months old at the time of writing this) and I’m a hobbyist photographer. My photos are probably the most important digital thing to me, then my countless hours of work I’ve spent on my documents, then my e-mail, then all that other stuff, like ripped CDs and DVDs, and some HD DVDs.

Let’s start with the “Just Awesome” stuff… most of this bucket falls into the Remote Web Access site, so from the outside in we go!

Remote Access is just Awesome!

For one, right from the get-go you can customize the RWA about as much as you want:
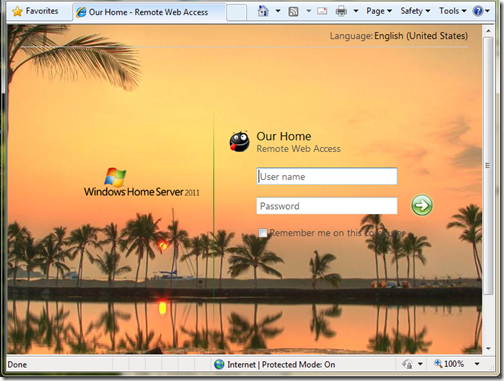
Customized Logon Page

(This picture can be found on my photoblog here)

Remember, you also still get that free 3rd level web domain and matching trusted web certificate (from GoDaddy.com) on the home server.com domain name. Did I mention free security?

You get remote access to computers behind your network, but this time it’s powered by TS Gateway for Server 2008 R2! Yes, that means you can get dual monitor support, and you can take advantage of better optimization for remote access to your PC and better security using that same web certificate for encryption! Thus no longer using security protocols from 8 years ago.

Remote Silverlight Video Streaming

Yes, no more TwonkyMedia chewing up your processor, a built-in, secure, streaming engine based on Silverlight, with (if you put in a fast enough processor) media transcoding:
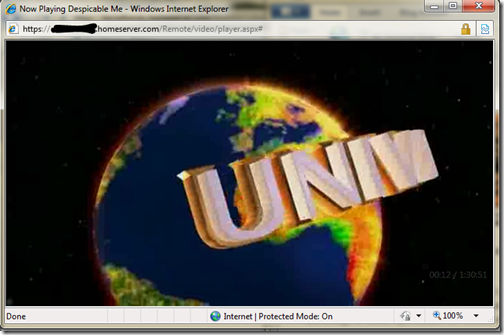
Silverlight Streaming

I also just *love* the photo slide shows. Sending access to the folks and letting them just watch 1000s of photos via a slide show, priceless:
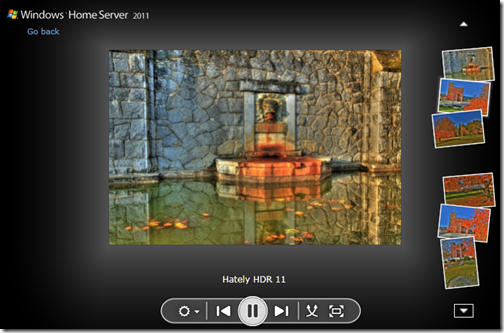
Home Server Picture Slideshow

A Silverlight Music Player that you can make, save and use playlists on. which you can quickly switch music around in. I even use this player in my living room when I have get a get together. People just understand how to use it:
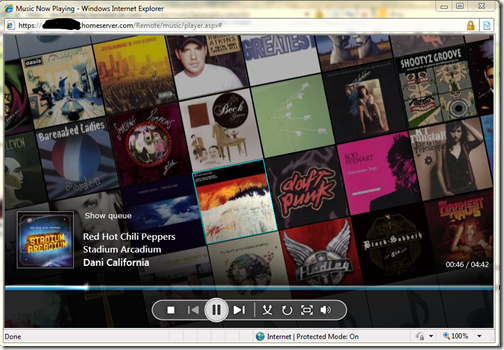
Silverlight Music Player

The ability to download or the ability to move files around without having to download. Yes, that’s right, delete, copy, cut and paste things all over the shared folders without actually having to download it.
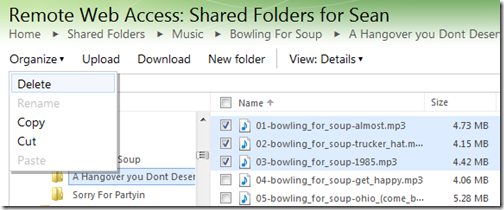
Organize your Folders Remotely

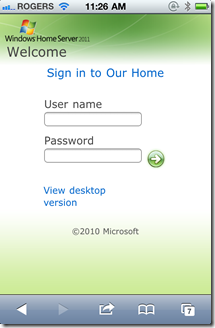
That’s a pretty powerful remote access story, one you won’t find with add-ins that run this flawlessly on the WHS v1 product… oh wait, I’m not finished, check out my iPhone formatted remote access webpage:

iPhone Logon

iPhone Folder and File View

And it looks just as good on an Android and Windows Phone 7!

While we’re talking about media, let’s focus on the internal network. With an implementation of DLNA 1.5 open standard for compatible streaming, you can stream to your XBOX 360, Playstation 3, DLNA capable TV, iPad (with application), Windows 7 PC (or slate!) or any other DLNA compliant device. You can also configure which folders participate in the streaming, simply by adding them to the set of defaults.
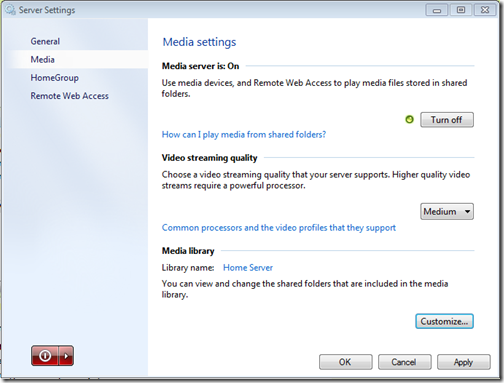
Media Streaming Settings

If we’re going to talk about handy apps, do you remember that awesome Vista Gadget for WHS v1 by homeserverhacks.com? It was called ShareMaster. Well, now included in WHS 2011, is the Launchpad, which enables you to easily backup your PC, access your Remote Web Access site (without having to know the URL, even if it changes!), Shared folders, and if you’re an admin, the Dashboard. It’s also completely extensible by the SDK, so developers can kick it up a notch and add more functionality:
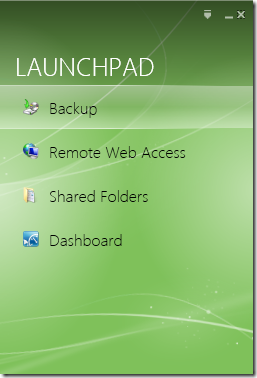
Client side Launchpad

That’s a whole lot of awesome packed into one box! I want to switch gears now and talk about how WHS 2011 protects my data, and why I think it’s safe. To me, the leading cause of data loss is usually hardware failure, most often then not, it’s a harddrive failure. Although there is the rare instance it can be a natural disaster, which happened to my uncle about this time last year.

Last but not least, is something you can’t see, that excites me the most. The Windows Home Server 2011 SDK (still in beta) is HUGE compared to the v1 product. Moreover, it’s SHARED with both Windows Small Business Server 2011 Essentials, and Windows Storage Server 2008 R2 Essentials. What does that mean? it means that things designed for business, can easily be used in the home (and vice versa). That means lots and lots of add-ins! and high quality ones at that. Nothing like developing for 3 platforms, instead of just one.

Data Protection, Why My Data is Safe on WHS 2011!

Data protection is all about having data on multiple drives. Take a look at RAID configurations. RAID5 is one of the most popular RAID configurations in the small and medium businesses, it’s probably sufficient for a home too, but sometimes it can be challenging to set up. RAID5 is a drive configuration that wastes up to 1 of a set of 3 or more drives to maintain “parity” bits. These parity bits are used to rebuild data on a drive if it’s lost. The system can run in limited capacity as soon as this drive dies without the end user knowing it. All in all, it’s a sweet system, but loose that 2nd drive before you can rebuild the array, and your data is toast!

What does Windows Home Server 2011 do? It keeps the data you choose on a second hard drive. Yep, the data on all your client computers is automatically backed up nightly to the Home Server. That’s up to 10 PCs safely backed up, every night. So now the data on your clients, is also on your server, two hard drives. There is a delay of 24 hours, but it’s there. Even if you get a Facebook Virus, you can roll back to the day before. This is exactly the same functionality as WHS v1, except it’s faster, and more robust.

What about the data on the server? Server’s hold data, isn’t that data safe? Yes of course it is. You can backup that data to an internal, or better yet, external hard drive! Unlike WHS v1, this has HUGE improvements. First, the backup is automated. Automated backups take the human error factor out, and the backup uses snapshots, so even open files are captured. I think I remembered to backup my WHS v1 about once/month. Now I’m getting 2x/day! And you know what, I choose the defaults because the server on my data doesn’t change that often. You can bump this up to as often as every 30 minutes. That’s your data, on another hard drive, 30 minute window of possible loss, but if I can’t trust a hard drive for 30 minutes, I’ve got problems with all the data that DOES change on my client computers, because that backs up every 24 hours! [And you can’t tell me that the purchase of an external hard drive isn’t worth your data backup, especially you, Mr. 22TB WHS v1! With or Without Drive Extender]

And…. if you want to do RAID, you can do RAID, you can do RAID1, RAID5, or even RAID10! If you want to do cloud backup (which I do because I’m too lazy to take the backup hard drive out of my house), you can do that, as a few providers are building add-ins.

So what did I really loose with Drive Extender being gone?

  • In the event of a hard drive failure, all my data isn’t still available until I put in a new hard drive and restore that drive back to its original state, if I didn’t configure RAID.
  • I can’t easily extend my storage when I have a disk that’s running out of space.
  • I can’t grow my share sizes past the size of all the hard drives in the system
  • My server storage responds faster because I’m not using DEMigrate.exe all the time

None of the above actually pertains to data loss. It’s all convenience. It was definitely nice to have in WHS v1, but I don’t think it’s absolutely needed in a server in the home.

Massive Data Collections

Let’s talk about Massive Data Collections quickly. Because WHS v1 made it so easy to grow your data collections, far beyond the size of one disk, without having to worry, “have I locked myself in to only X amount of data?”.

Let’s talk about my photo collection. It’s 80GB right now. That’s still not 1TB. I’m an amateur photographer, one that shoots a lot of photos, with a Canon 5D Mark II (a 21mp camera). I still have tones of space on a single 2TB drive to grow. What if I’m a professional photographer? Well, professional photographers don’t use Windows Home Server, at least I haven’t come across one. A good friend of mine has been interviewing professional photographers for some time, and they work with such large photos, they keep them locally, then archive them, usually via USB. Then if they want to work on them, they just plug them into the computer they are on, and it’s a local picture again. \

Video collections. My Canon 5D Mark II takes 1080p video. I use it a lot, that’s probably what jumped my photo collection from 60-80G in a year… but I’m still within reason. My video collection, is a rip of all my DVDs, and some HD-DVDs, and it’s still only 130GB, that’s still less than 1TB, and I still have all the DVDs in the closet, my music collection is 40GB… still have all the CDs. But I agree these data collections can get quite huge. This is probably the one place folks will actually miss Drive Extender. I couldn’t agree more.

… But maybe it’s time to take a hard look at what data you’re hording on your server. Do you really need to be a digital hoarder and save everything? I mean even Mozy can’t deal with you, as they announced they are killing their unlimited data plan. People save a lot, and it costs money, but do you really need it all? The guys at TechCrunch say “I assure you that you will never print those 10,000 pictures you have stored in iPhoto. Never. Ever.”.

If you absolutely *must* keep all that data, you should have a plan for it anyways. It’s not like if you store magazines for comic books, you don’t put aside space in a closet for them. With a plan, you can easily map out your storage needs, and growth. In fact, a few people even have growth charts of their storage growth from WHS v1, so you *know* the storage you’re going to need! I also suggest turning on File System Resource Manager and cataloging exactly which data is being used. I bet after a year, you use less than 30% of it.

So bottom line, I stay trim with my data (rule #1 of becoming a better photographer is forcing yourself to throw away 70% of your photos), I feel like Windows Home Server 2011 is the right product for me, for simplified access to my data. Simplified Management of my network, and extremely safe data protection plans. Moreover, because it’s Windows, it just works with other things in my house.

I liked Drive Extender too, but the product isn’t dead, in fact, it’s still awesome!

Monday, November 08, 2010

Announcing Windows Storage Server 2008 R2 Essentials

Now that Kinect has stopped stealing all of our thunder around announcements (although I have to admit I can’t wait for mine, it looks awesome!), we can continue rolling out announcements in the Small Business space. This morning, building on the Windows Small Business Server 2011 Announcement, we are announcing a new edition targeted at Small Business called Windows Storage Server 2008 R2 Essentials.

What is this Windows Storage Server 2008 R2 Essentials? It’s an answer to what the community have been begging for. Today we see a lot of partners put WHS v1 into small business for the PC Backup integration. WHS v1 only backs up 10 of those computers, and is a stand-alone machine you have to manage on it’s own. Breckenridge fills this gap for businesses allowing you to Domain Join Breckenridge to your SBS 2008/SBS 2011 Standard domains to allow backup for up to 25 computers, and additional storage for up to 25 users.

Home Console of BreckenridgeDomain Joinpicture 3

As you can see, it looks a lot like the Windows Home Server Codename “Vail” Edition and the Windows Small Business Server 2011 Essentials Edition. That’s because it is! It shares the same underlying architecture, which means all the same add-ins work on WSS 2008 R2 Essentials, as they do on the other products.

So what is the differences?

Home Server “Vail” WSS 2008 R2 Essentials SBS 2011 Essentials
10 user limit 25 users limit 25 users limit
10 computer limit 25 computer limit 25 computer limit
1 CPU Socket 1 CPU socket 2 CPU sockets
8GB RAM Maximum 8GB RAM Maximum 32GB RAM Maximum
No Domain Join Domain Join Domain Controller

Aside from the ability to Domain Join, and the user limit increase, there are some subtle differences you’ll notice throughout the product that have more of a business “tint”, like if you choose to use WSS 2008 R2 Essentials for Remote Web Access, you’ll notice the same defaults you see in SBS 2011 Essentials, instead of what you see in Home Server. There are also some changes to HomeGroup defaults as well. The last thing to note is while you can install WSS 2008 R2 into an SBS 2011 Essentials, or WHS Vail environment, the client connector from each of these products cannot be installed on the same PC.

So why should you consider WSS 2008 R2 Essentials for your small business or customer?

  • PC Backup for up to 25 PCs in your SBS 2008, 2011 Standard network. And yes, you can run multiple devices in the same network, and choose who has access via a domain group
  • Server backup – backup those PC Backups and other critical data on the WSS 2008 R2 Essentials server. (no, you can’t include the backup of this into your SBS backup)
  • Similar console management as our other products. But if you domain join, you don’t manage users from this console, and the password policy is inherited from the domain (even for local users left on the WSS 2008 R2 Essentials box)
  • If you are installing it into a standard server environment, enjoy the Remote Web Access functionality
  • Additionally, monitor the health of computers in your network
  • Media streaming in the business (training videos, etc)

Windows Storage Server 2008 R2 essentials should be released in the first half (H1) of next year (2011). While it can work as a stand alone NAS device, it’s primarily targeted at Small Businesses with an Active Directory in place and the need for PC Backup and media streaming functionality. When it’s released, it will be available through multiple OEM channels with multiple form factors.

To see the official announcement on the SBS Blog, navigate here.

To learn more about Windows Storage Server, and the new addition, navigate to their blog.

Specifically if you want to read more from the Storage Server Family on WSS 2008 R2 Essentials, they have published a post here.