Showing posts with label MediaSmart. Show all posts

Monday, April 04, 2011

How To Install Windows Home Server 2011 on your MediaSmart or DataVault Hardware

Well, I’m positive this is something that HP will not support, so don’t even think of calling them if you go down this road, but I figured it’d be fun if you wanted to continue to use the same hardware. I took this opportunity to get an HP ProLiant MicroServer, plus it does at least RAID1 (Mirror) where the MediaSmart or DataVault servers cannot do any form of RAID. But it’s still a cute little form factor. Also, I think the MicroServer is quieter than the MediaSmart (at least the ex475 that I had)

Additionally you’ll have to use the EX490/495 or DataVault as Vail requires at least 2GB of RAM, which aren’t in earlier models of the MediaSmart servers (e.g. EX470/475). So if you’ve got the grey top, you’ve got a lot more work to do that isn’t covered here. (I hear it works on the ex48x, but I only tried the ex49x)

Creating the Bootable Thumb Drive

SanDisk DataTraveler 8GB

The first step here will be to prepare your media, usually on your client computer. The image is slightly bigger than 4GB, so I had to step up to an 8GB thumb drive. I’m actually using the Data Traveller by Kingston. First you’ll need to format it and make it bootable. I already have instructions on how to do that here. Next up you’ll have to copy the Windows Home Server 2011 DVD to the root of the disk. This makes the Thumb drive and the DVD look identical in Windows Explorer. You’re almost there. As you probably know, the MediaSmart or DataVault server doesn’t have a video input, so you’re going to need to do the install via an “unattend file”. The unattend file is called cfg.ini, and needs to also be in the root of the thumbdrive with the WHS 2011 DVD image on it.

Inside the cfg.ini, you’ll need to answer questions, so design your file like this:
[WinPE]
InstallSKU=SERVERHOMEPREMIUM
ConfigDisk=1
CheckReqs=0
WindowsPartitionSize=61440

[InitialConfiguration]
AcceptEula=true
ServerName=VAILSERVER
PlainTextPassword=Passw0rd
PasswordHint=some password hint
Settings=All

Where VAILSERVER is the name of the server, Passw0rd is the server password and some password hint is the hint to remind you of what you set your password to.

Erasing the Primary OS Hard Drive

In order to have the MediaSmart or DataVault boot off the Thumb Drive for installation, you’ll need to completely erase the primary hard drive (the lowest one in the MediaSmart/DataVault server).

Remove the drive from the server and attach it to another PC (I used Windows 7) and then erase the primary partition. When you’re finished, place the drive back into the MediaSmart or DataVault server.

Installing Windows Home Server 2011

HP MediaSmart ServerThis is where the fun starts. Installation without feedback. Please note that this will erase the ENTIRE primary hard disk on your server, so make sure you have a backup of ALL your data, and customization. While you can most likely do a factory reset to bring back WHS v1 and get access to your data on other disks in the system, I don’t cover that detail on this blog, and don’t recommend taking that sort of risk with your data.

I recommend putting the box up on the desk where you can see the Health LED light and also listen to the hard drive(s). So let’s get started:


  1. Connect your MediaSmart or DataVault server to power, and network.

  2. Insert the USB drive into the bottom-rear USB port and disconnect all other USB devices. It needs to be the bottom-rear USB port.

  3. Power on the server. The server should automatically boot off the USB key, format the drive and install all of the operating system files. The health LED will blink the aqua through the BIOS bootup, then aqua/red during the OS installation. The OS installation takes ~ 8-10 minutes. You should hear the hard drives during this phase. I also constantly refreshed my router DHCP list so I could see when the server obtained an IP address.

    1. While the Answer file should take you all the way through setup, once you find your server get’s an IP address you can browse to http://<ip address> and you should see a webpage for WHS 2011 to download and run the wizard. I’d just leave it use the answer file, but if you left out the [Initial Configuration] piece out of the answer file above, you could also just run setup from here.

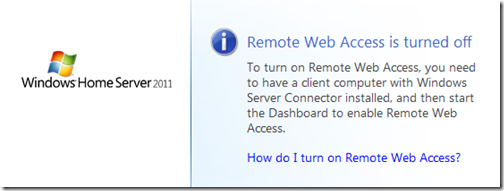
  4. The installation of the rest of the server took ~20-25 minutes for me. The LED light stopped blinking aqua/red and just went back to blinking aqua when it was done. Also, when I went to http://<ip address>, I saw the remote access site being turned off: Remote Access Disabled

  5. At this point I used “MSTSC” or Remote Desktop to connect to the server. clicking Start, then Run, and typing in MSTSC /V VAILSERVER, or whatever name you called it in the file above. When you log in using the VAILSERVER\Administrator, and the password you created in the cfg.ini file, you’ll see that the server is indeed setup and ready to roll: Your Server is now ready to use

I wouldn’t say the MediaSmart or DataVault server is as fast as my MicroServer, and it certainly is lacking 4GB of RAM, but it runs reasonably well:

Windows Task Manager

That’s all there is to it. Now just plug in your USB Backup drive, and set it up however you like.

Troubleshooting


  • Make sure you choose a name for your server that doesn’t conflict with another name on the network, this will halt the unattended configuration

  • Make sure you have at least 2GB of RAM, this will halt the unattended configuration.

  • Make sure you clean the system hard drive, otherwise it won’t boot to the USB disk.

Kudos to MediaSmartServer.Net

While I did these instructions myself, I was struggling at the location of having to format the hard drive, so kudos to the folks over at MediaSmartServer.net for the help here. Their steps helped get me over that hump, although I noticed that their cfg.ini file is a beta version, which has since been updated. My cfg.ini file is the correct one for the RC2 and RTM releases of Windows Home Server 2011. They also go into details about using the EX47x series that I don’t cover here.

Installing Windows Small Business Server 2011 Essentials

I targeted this post to Windows Home Server, as it’s more likely to have enthusiasts in the consumer space try this than in the business space. Businesses typically want the hardware RAID functionality that the DataVault or MediaSmart doesn’t offer. Additionally, being able to see what’s going on in a hardware failure is critical to a business, so the lack of a video card of a headless device is a show-stopper. HOWEVER, if you’re the type that wants to run SBS in your house, or you want to take this risk on to leverage this hardware, the same steps above work for SBS 2011 Essentials as well. The cfg.ini file is different though as it has more required fields:


[WinPE]
ConfigDisk=1
CheckReqs=0
WindowsPartitionSize=61440

[InitialConfiguration]
AcceptEula=true
CompanyName=Some Company Name
ServerName=SERVER
NetbiosName=COMPANY
DNSName=COMPANY.local
UserName=Admin
PlainTextPassword=Passw0rd
StdUserName=SomeUser
StdUserPlainTextPassword=Passw0rd
Settings=All

You’ll want to replace the bold items above with your own. Also, you’ll notice that you can use the cfg.ini file to change the .local of your internal domain name to whatever you want. We recommend .local, or .lan, or .internal work well too. DO NOT choose the same DNS name that you plan on using for your Remote Web Access website. For example, if you plan to use remote.contoso.com as your URL, do not use contoso.com as your DNS name for your internal network. Contoso.lan or Contoso.local is recommended. Or, while I haven’t tested this with SBS 2011 Essentials, I think you can choose internal.contoso.com if you absolutely must. Just don’t make them the same.

Friday, March 18, 2011

Going “Pro” using Proxure’s KeepVault Pro for Windows Home Server 2011

If you read my post from Tuesday of this week, on using Proxure’s KeepVault for Windows Home Server 2011 or Windows Small Business Server 2011, and when you got to the bottom, you thought to yourself.  Heck yeah I’m going Pro! Then this I post is for you. 

If you are running Windows Small Business Server 2011 Essentials, then this post will simply show you the features before you buy, because you had to get KeepVault’s pro version for your version of Windows Small Business Server. 

First, the upgrade process: If you have Windows Home Server 2011, and you’ve been enjoying the standard features KeepVault has to offer, but want to upgrade because one or more features in my previous blog post were appealing, here is how you do it:

  1. From the Launchpad, click on the Dashboard link and type in your Home Server Password to load up the Dashboard.
  2. Navigate to the KeepVault tab already installed in your Dashboard
  3. On the My Online Backup Job tab, click the link your account name.  For me it’s my email address to go to KeepVault’s website.
  4. Log into KeepVault’s website (you’ll need that subscription ID again) and follow the instructions to upgrade to Professional.
  5. Now you have to make the software aware that you’re running pro.  I remembered that the “Restore Files” link had an upgrade option, so I used that: Upgrade KeepVault Backup for Windows Home Server
  6. Since I already did the upgrade on the web, I just clicked Apply Upgrade, but you could also skip the first few steps and  have the Purchase Upgrade take you to KeepVault’s website.  When you’re finished upgrading the back end, you get this: Welcome to KeepVault Backup Pro
  7. Wow, I don’t even have to close the File Recovery wizard, I instantly have another option to selectively download from other computers I might backup. Selective Download
  8. I cancelled the above wizard, and I’m still in KeepVault Pro

You’ll now notice little changes throughout the UI like the above recovery option, for example, if you flip over to the My Local Backup Job tab, you’ll see in the drop down list that you can add a network drive to backup locally to:

Add a Network Drive ...

Sub Users and roaming backups

In addition, the Pro account now gives me access to add “Sub Users”.  Brilliant!  So now I can just install the Windows 7 version of KeepVault on my wife’s computer, and have her files and folders backed up directly to the cloud while she roams around with her laptop.  Or better yet, in Windows Small Business Server 2011, you often have roaming sales people or people who are away from the office for long periods of time (perhaps even satellite offices?) you can simply install KeepVault on their PC, sign them up as a sub-account and have them back up directly to the cloud.  Need a file from them? Then simply restore it to the server. 

Adding a Sub User Account

Accessing your Backup through the Web Portal

When you click on your account name (in my case my email address) in the My Online Backup Job and log in with your subscription ID, you can click on the Web Access tab.  It’ll prompt you for a web access password (I skipped this because I was so excited about Sub Users, If you’re like me, simply disable web access and enable web access and it will prompt you again).  Once you have your password in place, you can click the Open Now web link to jump right into your online backup.

Web Access Tab

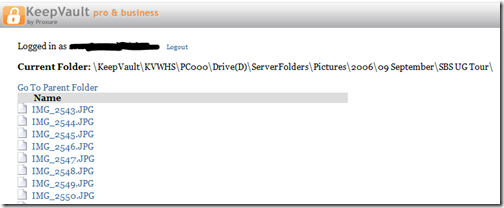
If you don’t want to log in with your Subscription ID, there is a quick jump to http://web.keepvault.com, which will jump you right to your web view of your backup.  Which by the way is raging fast, even though it’s reading encrypted files.  For example, if I wanted to download files from my 2006 User SBS Group Tour, I can simply browse to the folder, click the file and download:

KeepVault Backup Web Access

Retention Policy

As mentioned in my previous post on KeepVault, you also get a retention policy of 5 versions of files.  To restore previous versions of the files, simply do a Selective Restore, and when you get to the file, right-click it and choose the version of the file you want.  If there is no context menu, you only have one version (the latest) backed up.

From the Web Access, if you click on a file (screenshot above), you see all the versions of the file available to download.  You should keep in mind the following:

  • If you delete a protected file from KeepVault, it deletes all versions
  • File versions younger than 48 hours are never deleted (if you save a word document 10 times for example in the same day and backup is configured to “automatic”
  • The oldest 5 versions of a file are pruned (read recovered storage space) after the 10th version of a file is successfully uploaded

So as it turns out, it’s pretty easy to go Pro, if that suites you, and Small Business Owners, now you have details of all the Power Pro gives you at your finger-tips.

Tuesday, March 15, 2011

Online Backup using Proxure’s KeepVault for Windows Home Server 2011 and Windows Small Business Server 2011

As I’ve mentioned before, being a photographer, my photos are my most critical piece of data that lives on my Home Server.  When using Windows Home Server v1, I had found an Online Backup solution that I previously reviewed on this blog.  While I still think it’s a good solution, it has some draw-backs depending on the Amazon S3 back-end.  Like the cost of Amazon S3 is about as expensive as it gets, and signing up for Amazon S3 was probably one of the more confusing processes I have ever done.

While at SMB Nation 2010 in Las Vegas, I had ran into a company called Proxure who build a solution called KeepVault.  I watched a demo of their solution run and it seemed reasonable, at least to check out.  I thought it was pretty cool that they offer versions for Windows XP, Vista, Windows 7, Standard Server (03 & 08 via their Professional version), and most importantly for me: Windows Home Server.

KeepVault Add-In

While this blog covers KeepVault on Windows Home Server 2011 (codename “Vail),  the same add-in offers cloud storage to both the Windows Small Business Server 2011 Essentials (codename “Aurora”) and the Windows Storage Server 2008 R2 Essentials.  However, for these business products, you need to get KeepVault Pro.  The steps and UI, aside from the color of the dashboard, is identical.  KeepVault Pro can also be used on Windows Small Business Server 2011 Standard (codename “SBS7”), although that UI is not shown in this blog post.

Back to the review: The first thing I notice was KeepVault doesn’t bill you for what you use, they bill you for storage space in chunks (40Gb, 80GB, 130GB, 200GB … 3.5TB!).  So if you’re only backing up a very small amount of data, you could end up over paying, but if you compare to Amazon’s 15cents/GB (up to the first TB), you really see a cross over at about 15GB.  Once you get over 15GB, Proxure seems to win hands down on cost.  Plus when you hit the top mark, you click a link and you can bump up your storage. 

The Setup Process

Using the AWIECO Drive Info add-in, I determined I wanted to back up my Pictures and Documents, the things that I really care about.  That came out to about 117GB, so I signed up for the 130GB plan from Proxure.  You don’t need the AWIECO add-in, but it made it a “glance” to compute.

Installing the add-in is just as painless as installing any add-in.  Just double click on it on the server, or on any server-joined client, read and accept the EULA, and then Install it.  You’ll have to re-start the Dashboard to have it appear in the global tabs.

Proxure KeepVault Add-In

The initial page doesn’t look intimidating at all.  Simply click on the Order a KeepVault Backup for Windows Home Server Subscription Now button and sign up. I thought it was pretty slick you could pay via PayPal or with a standard credit card. I’m all for yearly payments too, so I got to save my 10%!! Within 5 minutes I was emailed my subscription ID. Typing that in, with my email ID and I’m good to go.

Choosing an encryption key I can type one in myself, or KeepVault will randomly generate one for me.  If you generate one yourself, you have a risk that you forget your key and now your cloud backup is useless.  If you’re like me, you’ve installed WHS 2011 on new hardware and it’s probably a while before that fails, so you might forget it.  If you don’t want this cumbersome task, you can let KeepVault choose one for you.  The interesting thing here is that they generate the key based on your ID and subscription numbers (as its computer agnostic).  To me that means that someone at KeepVault *could* decrypt your backup.  Although my suspicion here is that you are still safe because our data is stored in blobs and because KeepVault has more than one customer, it’ll be hard for the lay-man IT person at KeepVault to match this up to your backup.  For what it’s worth, I went with “Let KeepVault choose one for me”.

I like how KeepVault really focused on the simplicity of the solution.  With the previous solution I reviewed I could create multiple backup jobs and multiple schedules, which was nice, because parts of my collection barely every change, I just wanted them backed up.  But it was overwhelming at first.  KeepVault’s “Always/Real Time” schedule by default and the single “Job” configuration removes any daunting thoughts you might have.  The only confusion on the whole page for me was enabling the protection on the shares.  I didn’t realize the grey bar across the page were actually buttons, as most of the WHS 2011 console they are just “headers” of columns.  So once you realize that you can just click on Enable Protection to add that shared folder to the cloud backup, it was all good.  As any good add-in, you can also right-click on a Share in the list and select to enable or disable it from the context menu.

Enable Protection for Shared Folders

Using the Add button you can also add any folder you wish on the system, so it doesn’t have to be shared out to the network in order for you to back it up.  You’ll also notice in the screenshot above that I have changed the schedule to be between midnight and 6am.  This is because I am uploading 115GB of data, and I work from home, so from 8am-6pm I use my bandwidth for work, and from 6pm-midnight, I use it for entertainment.  By default, KeepVault will Encrypt and Compress your data on the box before it sends it over the wire.  Nifty…

KeepVault Job and Setting Options

The only feature that I think is missing from the Job scheduler is the ability to run 24/7 but use less bandwidth during the day, and all of it at night.

Looking at the other options, you can always pause the backup, view and delete your protected files online (ie. if you want to permanently delete some files, you can delete the file locally, and use this task to delete it from the cloud as well), view the protection/upload history, configure a proxy if your ISP requires one, and most importantly (the reason we all do backups), Recover Files.

The Event Log is KeepVault’s own list of events (like service start/stop, etc events).  Messaging (while somewhat confusing of a name, maybe “Job Notifications” or “Job Alerts” might be better, is actually really well done.  You can receive emails or SMS alerts (via your carriers E-Mail to SMS service) based on your backup failure rates.  KeepVault obviously has some mail service on the back-end that they allow you access too, because unlike the WHS 2011 Built-in Alerts, they don’t ask you to configure an SMTP service.

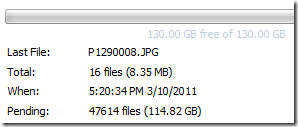
When the backup eventually kicks off, if you’re backing up as much data as I am, even with the 1900kbps as advertised in my standard version of KeepVault, I’m in for a long wait…  This is the same with every cloud solution the first time you back-up.  The progress is good, you get both global progress as well as file level progress

Global Progress of Upload

From 5pm to 9am (~16 hours) on a Thursday night over my cable connection, I backed up 5.1GB to KeepVault’s cloud.  Not quite as fast as the Amazon S3 solution, but then again, I don’t have a Pro account with KeepVault.

Once your data is uploaded, it lives in Proxure’s Data-Center, encrypted for only you to download in the event of a disaster.  Fingers crossed that this is just an insurance policy, and never used.

KeepVault Local Backup

You may have noticed in the above screenshots there was another sub-tab called My Local Backup Job.  Yes, KeepVault can back up to a local disk.  In the Standard version, it’s similar to the built in WHS 2011 Backup in the fact that it can only backup to hard drives attached to the system (the recommendation is still for USB for offsite storage).  If you have KeepVault’s Premium version, you can also back up to SMB Share (i.e. \\NAS\Share), so if you have another device on your network, you can back up to another share on your network.

Also, you’ll notice that this tab also allows you to compress or encrypt.  So if you’re taking that disk offsite, the encryption piece might be something you want to consider for safe storage of that disk should it be compromised.  If you don’t encrypt it.  Files are stored in “explorer friendly” format so a restore on any computer without KeepVault installed is possible.  In comparison, WHS 2011 backup is stored in VHD format, which requires you to first mount the VHD before you can actually do the restore of files.

Recovery of Files

File Recovery

The One-Click Recovery, really is just that.  Let’s say that you have a little child at home, and their favorite past time was to go into your prized photo library and use the delete button, just randomly through your collection.  Or maybe you were searching for your favorite files, and then miss-clicked and deleted your favorite files across your 100GB collection.  Restoring that can be painful.  This One-Click Recovery makes that a breeze.  As *soon* as you click next (i.e., one click), the service will compare the cloud to the local box, and recover all missing files.  If the file exists, the restore will be skipped, preferring the local file over a recovery.  So you can recover all those files our child deleted randomly, yes with one-click.  Obviously this is how you would go on a new server, because none of the files exist.

Selective File Recovery DialogThe Selective Recovery is more of the natural way we think about recovering.  You get your standard tree-view and you can drill into your cloud backup and select different files to recover.

This way is not a single-click restore, but a selective restore.  On the left-hand side if you select a folder, you can select files and folders on the right-hand side for restore.  So if you’re restoring a whole folder, select the folder above it, and then check the box next to the folder you want to restore. If you’re restoring all but a few files in a folder, that can take a few extra clicks.  Thankfully you can use the CTRL or SHIFT Keys to multi-select as you need (similar to Windows Explorer). Before moving on, you need to select if you want to over-write existing files.  This was weird to see on this dialog, because I figured it would be a sub-option on the recovery location which is next.

Once you’re comfortable with the set of files you’re going to restore (and if you want to over-write files), you next choose if you want to restore the files to the original location, or another location.  Unless I’m restoring a completely new server, I’d probably always choose another location to make sure that I’m getting what I expected.  Once you’ve chosen the folder for the location of the restore, I hit “Recover”, and just wait for the software to download the files and put them in the appropriate place.

Recovery Progress

The restore is in fact pretty painless, and yes, my photos came down in-tact…

Test Restore Thumbnail View

Why Go Pro?

As you saw above, KeepVault has two versions, Standard (which they just call “KeepVault”) and Professional (or “KeepVault Pro”).  As a home user, you  might not ever need the Pro version, but it’s certainly something you need for businesses.  So what do you get if you go Pro?

  • Support for Server solutions (aside from the WHS).  For example, the Windows Small Business Server 2011 Essentials, Standard and Windows Storage Server 2008 R2 Essentials.  Also, if you have additional servers in your environment, you can back them up to the same account (Standard Server 2008 and Standard Server 2003).
  • A much faster upload rate (5250kbps instead of 1900kbps).  This comes in handy with that first backup.  The faster you get the files to the cloud, the sooner you are protected!
  • Local Backup to UNC share.  Meaning you can back up your server to a local server share as well.
  • Higher encryption levels (256-bit encryption can be chosen instead of 128-bit)
    • This reminds me.  If you backup a file with the pro version, and then downgrade, your standard client can’t understand the 256-bit encryption and thus can’t restore the files.  It does work the other way around though.  So just be careful which way you go!
  • More Access to your data (Web Access, cross device access for restore) and other administration features.  Notice my screenshot under “Restore” above, if I had the pro version, I could backup files and folders from other computers, right to this single computer.  This means I could support cloud backup on my client computers, and then restore this to the server in the event that the client was dropped while out on a trip!  Another brilliant business feature.
  • If you’re using a management solution, error notification includes system events, so you can track errors in your online backup with your monitoring tools.
  • 5 version retention policy.  If you are with KeepVault standard, you only have the latest version stored on the internet, with Pro it keeps up to 5 versions so you can go back in time when you wish to restore.

As a business user, you’ll have to use the Professional version to get the add-in installed.  As a Home User, you should review the features above and gauge how critical they will be for you. 

If you’re still debating having a Cloud Backup solution for your most prized data, you should approach it like an insurance plan.  You have one for your house, you have one for your car.  You cross your fingers every day that you don’t need to use it, but when you do, it’s there for you.  If your hard-drive fails, recovery of such drives can often cost $1,000s, with no guarantee you can get your data back.  If you’re house burns down, like my uncle’s, this sort of thing is priceless.

I’m using KeepVault, what are you using?

UPDATE: Want to learn more about KeepVault Pro? Check out my Going Pro with Proxure’s KeepVault blog post.

Thursday, February 10, 2011

How to Enable TimeMachine Backup for your MAC to your Windows Small Business Server 2011 Essentials or Windows Home Server 2011

Well, I don’t often dabble around with a MAC, I just can’t get used to the single mouse button and pressing a key on the keyboard for a simple context menu.  I’ve quite possibly been assimilated to Windows.  However,  protecting your data is important, even if you are on a right-click less product.

As you probably know by now, the Release Candidate of both Windows Small Business Server 2011 Essentials, and Windows Home Server 2011 is now live. Which means you can download and install them!!  You should take a moment and do that now.  I’ll wait.

Once you have these installed, you can easily add your Windows based PC to the server and to the PC backup by simply going to http://server/connect on your client PC.  Click the install for Windows PC button and follow the instructions.  Windows PC’s are automatically added to the backup which takes place in a round robin style nightly.  When you’re on a Mac, it’s the same thing, but you click “Install for Mac”, you end up with a launch pad and access to the server, but no default backup.

It has to be possible right? I mean everyone knows that a MAC is really a *nix box with a really fancy UI (and no right-click).

Poking around on the Internet, you can find some steps, like how to get unsupported volumes to appear to the TimeMachine engine, with the help of a friend (thanks Fabian & Craig) we’ve managed to put together these steps, which work for both Home Server 2011, and SBS 2011 Essentials:

  1. First, create an SMB share on your server using the share permissions wizard, let’s call it Mac Backups.  Make sure the users who are on a Mac have Read/Write access.
  2. Change the Mac TimeMachine to show unsupported Network Volumes by going to Finder, then Applications, Utilities, Terminal.
  3. Inside the Terminal, type this command defaults write com.apple.systempreferences TMShowUnsupportedNetworkVolumes 1.  This sets the showing of unsupported network volumes to TRUE.

 Showing Unsupported Network Volumes

  1. Obtain the MAC’s MAC Address. A MAC Address is the hardware address of the local network card.  It’s important to choose the MAC address of the built in wired connection.  To obtain this, you can run the command from the terminal: ifconfig | grep en0.

 Finding the MAC Address

  1. Next (and this is the confusing part, so bare with me) we need to create a sparse file on the MAC and copy the server share.  A sparse file is a file that you define a CAP size, but it will probably take up much less (we’ll define it as 200GB in this example).  This file creation process is a little tricky.  To do this, type in to the same terminal above: command ‘hdiutil create –size 200g –fs HFS+J –volname “<CLIENT_NAME> Backup” <CLIENT_NAME>_<MAC_ADDRESS>.sparsebundle’ Where the MAC client is called <CLIENT_NAME> and the MAC Address on the primary wired connection to the MAC is <MAC_ADDRESS>.  This means if you’re client name was OSX, and your MAC address is 00:00:1F:12:82:92, then your command would be: command ‘hdiutil create –size 200g –fs HFS+J –volname “OSX Backup”  OSD_00001F128292.sparsebundle’  .  Here is what it looks like this client is called “macmini2” and has a MAC address of 34:15:9E:09:00:94


Sparse File Created

  1. Copy this file to “\\SERVER\Mac Backups\” that you created earlier on the server. As you probably know if you are a MAC user, you have to mount the volume:

 Mount the Server Share on the MAC

  1. Load up the Time Machine settings from within System Preferences, and the sparse file you created above should be in the list.  Select this as the target for your backups.  This will have every TimeMachine backup backup directly to a share on the server:

 Configuring TimeMachine to use the sparse file

  1. Repeat for all your Mac computers on your network.

Once you have completed these steps, your MAC will start using the Windows Home Server 2011 or Windows Small Business Server 2011 Essentials as the backup TARGET.  This means it will back up over the network using the built in timeline functionality, on the schedule you define inside timeline.

What is also cool, is while the MAC won’t show a percentage complete like the PC does when performing the client backup, it will tell you the status right in the console, which of course falls through to the alerts.

Mac Backup Successful:

Mac Backup Successful

Mac Backup Unsuccessful:

Mac Backup Unsuccessful

So there you have it, How to backup a MAC to a Windows Home Server 2011 (aka Vail) or Windows Small Business Server 2011 Essentials (aka Aurora) Server.

For reference, here is the team reference for WHS v1

Monday, July 12, 2010

Announcing the next releases of Windows Small Business Server

Today we (as in our fearless leader Kevin Kean) pulled the lid off what our team has been working on for the past few years. Two new versions of Windows Small Business Server. That’s right. TWO new versions.

From a traditional standpoint, we’ve continued the single-server mantra with Windows Small Business Server “SBS7”. This version includes updates to all the major products in SBS, such as Windows Server 2008 R2, Exchange Server 2010 SP1, SharePoint 2010 Foundation, WSUS 3.0, and SQL 2008 R2 (with Premium edition). These new versions provide our customers with security and management. We also included a brand-spanking new version of Remote Web Workplace! This version of SBS will continue to support the familiar 75 users

The second version, code named Windows Small Business Server “Aurora” is the new edition of SBS. It’s cheaper than SBS7, and is even a lighter weight “first server” option for small businesses as is a hybrid server delivering both on premise services, as well integrates with the cloud. It also includes PC Backup, and server backup/restore capabilities. The same new version of Remote Web Workplace! This version of SBS will support up to 25 users.

Aurora

“Aurora” also brings a key new functionality of add-ins to drive integration between new and existing on-line services with Aurora. Developers can find the SDK on Connect. We have been working with a lot of partners with SBS Aurora such as Symantec, Level Platforms and Disk Keeper are all making statements this week around plans to integrate products with SBS Aurora. HP is not only showing SBS Aurora in their booth at the Microsoft Worldwide Partner Conference, but has a sneak peek at http://www.facebook.com/CoffeeCoaching. And you’re sure to hear more as we get closer to releasing the preview.

You can sign-up to be notified when the Preview of these servers are available over on the SBS Connect website.

It’s nice to finally be able to talk about the products I’ve been working on for the last number of years!

[Official Blog Post on the Official SBS Blog]

[First discovered review of SBS7 and Aurora, by Paul Thurrott]

Friday, February 05, 2010

Online Backup using CloudBerry Labs for Windows Home Server

Being a photographer, I get pretty worried about losing my photos. Not only the ones that I publish to my website, but the family photos that are never made public, they are priceless to me. I naturally have a built in backup set up to back up to a 1TB USB hard drive. And I’m super diligent about manually running this at least once or twice per month. This of course covers me against any hardware failure in my Media Smart server. Thankfully I haven’t had any yet, even though hard drive failure is the leading cause of data loss:

Causes of Data Loss

So, as it turns out, I’m not at all worried about disk failure, I’m totally covered there with duplicate through Home Server’s Drive Extender, and my bi-monthly backup. What I am worried about is natural disaster and theft (not that I live in a scary neighborhood in New York City or anything). The idea of natural disaster protection was made even more prevalent when my uncle’s home burnt to the ground early January, 2010 and he lost all of his memories in the fire. Sure insurance is taking care of the house and replaceable items, but what about the photos, or the trophy’s my cousin’s won on his mantel?

Luckily for digital data, it’s easy to move around and easy to store. Cloud based backup and storage can provide peace of mind and insurance against such loss. While I’m not an expert in cloud storage, I was looking for a few key things:

  1. Global replication – what good is a backup solution if it’s in a single data center around the corner? You want geo-located, so a natural disaster that strikes and entire area, doesn’t affect your data at your storage location. This usually means bigger the better.
  2. Encryption – I certainly don’t want owners of storage facility browsing my pictures. This usually comes with some component of the encryption that you own, like a password, which prevents the cloud storage owners from knowing this. (Although you won’t want to forget your password!)
  3. Simplicity and Automation – I don’t want to be spending a lot of time figuring out how to use the software, and I certainly don’t want any human factor in remembering to do the actual backup! Automation was key for me.
  4. Price – Hey, everyone’s looking for the best deal right?

Enter CloudBerry Labs Backup. CloudBerry is an interesting solution to the cloud backup story. They provide the software that adds the simplicity, automation and client-side piece, while Amazon S3 provides the back-end storage. This means you pay a 1-time up-front cost for CloudBerry, and the recurring cost goes directly to Amazon S3. Amazon brings #1 to the game, global replication and they are BIG (so big that discounts are given in TB instead of GB!). Amazon EXPECTS a LOT of data! I can’t say that AmazonS3 is the cheapest solution, at $0.15/GB (until you get to 10TB), they end up costing me about $20/month (~130GB of data). That’s a total of $240/year. There are cheaper solutions out there, but are they as functional as Amazon S3? Will they be in business in 2 months or 2 years? Also, Amazon has a lot of bandwidth so your uploads and downloads are fast. I’ve seen some backup solutions take upwards of 2-3 months to get a photo collection similar to mine uploaded. My 130GB of data took little over 1 week to upload, and my recovery’s are even faster. The limitation as far as I can tell, is my own bandwidth.

CloudBerry Backup Tab

CloudBerry backup homepage

CloudBerry backup has a Winodws Home Server add-in, which makes management very very simple. Loading the add-in shows CloudBerry in a new tab; which opens with an extremely simple design for start-up. However, after using CloudBerry for a month, I’d like to see more status on the home page: meaning I have my backup plans in place, I’d rather see some status on the last backup(s) to ensure that I’m safe. But no one can argue the design is simple, and targeted towards backup and the most important piece, the restore. Additionally, you can get to status with a simple click on the Backup Plans sub-tab. I do enjoy a big bold number of how many GB I’m using, as it helps me understand what my monthly bill would be. A dollar value would be nice to see here too, but that would depend on querying Amazon, as I’m sure Amazon reserves the right to adjust prices as they see fit (hopefully down!)

Once setup, CloudBerry is a totally simple solution. Unfortunately, much of the complexity for the setup comes from AmazonS3 requirements. Before even using the CloudBerry software, you must setup your AmazonS3 service. CloudBerry has provided a handy instruction set exactly for that, clearly indicating they know it’s a troublesome point and are probably working on it, given the simplicity seen through the rest of the product. The setup involves creating an AmazonS3 account, and identifying your personal access Key, so Amazon can bucket the data in your personal storage space up on their service.

Because of the cost of the AmazonS3 service, CloudBerry has allowed you to be as specific as you want for backup of your data. The Windows Home Server version can even handle drive extender and show you just the data that you care about.

Backup Selection Page

Further filtering on what you chose allows you to choose what TYPES of files to backup… so you can get to the heart of the data. This means you can choose your photo directory, but only backup your negatives (ie. RAW files) simply by choosing to backup .raw or .cr2, if that’s what you want to do.

One of the nice features was a compression feature. CloudBerry will compress your data, again, focusing on saving you coin with Amazon S3, as well as choose the type of encryption you want. Notice how you get to choose the password and encryption type. If you do end up using encryption CloudBerry will be pretty CPU intensive as encrypting files takes some time and CPU. It does happen in the background seemingly at a lower priority as I noticed minimal slow-downs across the rest of the product.

Compression and Encryption Page

Finally, the wizard lets you choose your backup schedule (yes! There is that automation!) and you can setup CloudBerry to email you when the backups complete, successfully and/or with failure! Once you’re finished setting up the backup, and you launch it, you get some nice progress when viewing the backup plans sub-tab:

Backup Plans and Progress

The plan page provides a lot of the detail that I would have expected to see on the home page, but the data is all readily available for you to see. The plans first appear compressed, so you have to expand them. I’m happy to report that they do remember that you wish to have the plans expanded, and that’s not something you have to do every time to view the details of each plan. As you can also see, I have multiple plans running. Right now I have them both backing up weekly, but I could easily sku that to be monthly for music, and daily for photos. You’ll have to assess your own comfort for data loss (more often backups tend to lead to less data loss as the deltas between backups are smaller).

The backups are incremental, meaning CloudBerry does the work to figure out what’s up at Amazon and what’s not, and sends only the new stuff and what’s changed since the last backup. Thus minimizing the bandwidth usage for your home and your storage usage up at Amazon!

Recovery

The most important part of the backup is actually the recovery. Because of the size, I didn’t recover all of my data, but I did a few spot checks here and there with some music and some photos. Simply launching the restore wizard allows you to choose when in time you want to recover your files. Naturally the default is the latest, but if you managed to mess up one of your photos, you can jump back to a space in time, provided that the backup of that file is there of course.

Restore Version

CloudBerry again shows you what you have on Amazon and allowing you to pick and choose entire directories, or individual files, allowing you to recover these files to the same location, or choose a new location if you don’t want to overwrite the original. Additionally, to prevent overwrites, you have to explicitly choose to overwrite the files if you’re going to the original location. Nice safety feature there.

The page that threw me for a loop was the password page. The default is of course not to require a password. If you skip over this page, and you had set a password on the backup, you’re recovery will fail, and you’ll have to start over. I wish CloudBerry was smart enough here to know that I set passwords beforehand and default this to checked, at least prompting you for a password before you continue. It would be great if they validated that password against Amazon prior to continuing as well, to prevent you going through the rest of the wizard, only to have it fail on restore.

Restore Password

The recovery is much the same as the backup, you get a progress bar, and the files slowly pop onto the server (dependent of course on your own bandwidth).

As a final note, the history sub-tab of CloudBerry will show you exactly what’s going on, backups and restores. As you can see, here is a test recovery that I did, where I messed up the password dialog I called out before. Running the restore again, with the password, it succeeded with no problems

Plan History

All in all, CloudBerry provides a solid backup solution. There are very few bumps on the road, mostly imposed by AmazonS3, including the cumbersome setup process, and the actual cost of storing the data. However, don’t forget that you *can* do wonderful things with AmazonS3, such as (if your data is not encrypted, and your account is setup this way), you can send links to your data around, saving your home bandwidth for your family to see your data. And because Amazon is so huge, you know that one day, they aren’t going to up and disappear.

Online backup is an insurance policy, think of it as such. $240/year is a small price to pay if you’re my uncle and your house burned down.

Download CloudBerry backup for Windows Home Server

Saturday, January 02, 2010

Troubleshooting Remote Access on the Home Server Blog

In a follow up to last weeks blog on Understanding and set up of Remote Access to Windows Home Server, Sean Daniel, Program Manager for Windows Home Server, has provided further information on potential issues that you may experience when setting up your Remote Access, and how to solve the problem.

Once you finish setting up your remote access through Windows Home Server’s Wizard, a final screen will be shown.  In a perfect world, when you click on Details you’ll see all green checks once you have finished this wizard.  However, because there are three components (the home server, the ISP and the router), sometimes there is a snag in the setup. Here is an example of a working domain name with sample data:

image

The first check-box will actually check to make sure you have an outbound connection. This will ensure it can connect to the specific …

Read more at the Home Server team blog.

Thursday, November 19, 2009

Get Windows Home Server Power Pack 3 on November 24th!

According to the Official Windows Home Server blog, Windows Home Server Power Pack 3 will be available for install on November 24th!

The Windows Home Server Team is pleased to announce that Power Pack 3 will be available in all shipping languages (Chinese, English, French, German, Italian, Japanese, and Spanish) on November 24th, 2009. Power Pack 3 will be made available to existing users via Windows Update. Users need to have Windows Home Server with Power Pack 2 already installed on their home server. Power Pack 3 will automatically install as part of Windows Update if Automatic Updates is enabled on the home server.

Details on what’s new:

Windows 7 Backup & Recovery

While backup of Windows 7 clients worked prior to Power Pack 3, there were definitely some noticeable problems, such as when a Windows 7 PC was sleeping, when it woke up, there was no guarantee it would do the backup or not.  Having run Power Pack 3 for the past week, my two Windows 7 PCs haven’t missed a backup yet!  Additionally it suppresses that pesky Windows 7 backup warning designed for single PC homes!

Windows 7 PC Backup support

Windows 7 Libraries

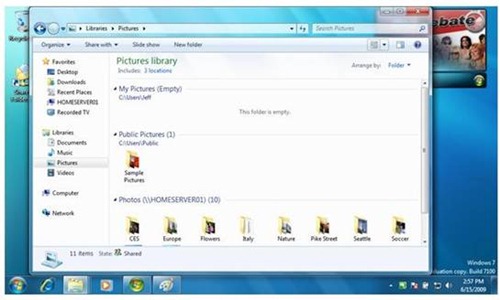
If you haven’t used Windows 7  Libraries yet, you’re missing out.  On my Netbook I added the Home Server shares in myself, since there is no data there.  I was happy to discover this is done automatically for me on my other PCs now and I can access all my data with a simple CTRL+E without having to use the handy Share Master gadget.

Windows 7 Library Support

Windows Search

Windows Search 4 is included, which drastically increases the speed at which you can search shares from Windows 7 clients (and other clients with Windows Search 4 installed).  Additionally, EFS encrypted files are supported!

Windows Search

Windows Media Center TV Archiving

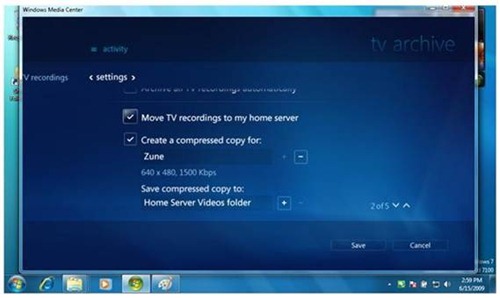
If you have a Windows Media Center in your home (which I don’t), then you’ll be easily able to Archive your TV to your home server.  Did you like that episode of “How I met your Mother”?  Save it without using valuable recording space on your MCE!  Additionally, you can get statistics such as storage space, backup status, etc right from your Media Center

Media Center Improvements

So, Tuesday night when you get home from work, you might want to check out Microsoft Update and get this little gem of free upgrade software for your Home Server.

Here’s what the MVPs are saying:

If you've recently upgraded to Windows 7, Windows Home Server Power Pack 3 is an essential download providing enhanced integration between the two platforms and a number of cool new features. Combine library support with enhanced features for Windows Media Center, and we're really starting to see Microsoft bring together the Windows Home Server and Windows 7 client experience so that your media can be stored on your home server and enjoyed seamlessly on TV, PC and Mobile devices with little effort from the user. The bad old days of copy, paste, convert and transcode may well be behind us,” says Microsoft Most Valued Professional (MVP) Terry Walsh of We Got Served.

Microsoft MVP Alex Kuretz of MediaSmartServer.net says “Windows Home Server Power Pack 3 makes storing and accessing your media easier by bringing all the content contained on your Home Server smoothly into your Windows 7 libraries. TV Archive is also a very nice feature that has allowed me to record TV shows and move them to my Home Server to be watched at a later time.”

Trackback: Windows Home Server Blog.

Thursday, September 10, 2009

How to Add more Playlists to the HP EX485 MediaSmart Server’s Web Streaming Application

One of the most frustrating things for me when I first used my EX 485 HP MediaSmart server’s web-streaming application for my music was my playlists that I have in the Zune software don’t automatically appear here.

In fact, I couldn’t get them to appear at all!  I dropped them into the music share, I made new ones with Windows Media Player, both .wpl and .m3u and they still didn’t appear in the list.  Well, I finally figured it out and I wanted to share exactly what I did so I don’t forget, and in hopes that someone else might benefit from the same (wasting a little less time!).  If you have a simpler way, I’d love to hear it.  Comments are open!

Let’s say I want to move my “Favourite Albums” playlist.  Here is how I did it:

  1. Browse using Windows Explorer to the location of your playlists.  They are “.zpl” files.  If you aren’t sure where this is, in the Zune software click Settings and then select Collection. Look at your music folders for where it might be stored.
  2. Once you’ve found the .zpl file, copy it to a new location like your Desktop.  This can be an auto-playlist, or a made playlist, it doesn’t matter.
  3. We’re going to need to change the extension on the file to one that Windows Media Player will read.  So if you haven’t already you’ll need to show the file extensions in Windows by using a Windows Explorer Window. 
    1. Press Win+E to open Explorer
    2. Press Alt to activate the menu
    3. Under Tools select Folder Options.
    4. Under the View tab, uncheck Hide Extensions for known file types.  (you can un-check this again after your finished if you don’t like the extensions showing)
    5. Click OK and close Windows Explorer.  You will notice your Zune playlist will now be <name>.zpl .
  4. Rename the file either by slow-clicking or pressing F2. Select the .zpl extension and change it to .wpl . 
  5. Click Yes on the dialog that warns you about changing the extension. Notice the icon will change to one that is recognized by Windows Media Player.
  6. Double click the playlist, and it should open in Windows Media Player.  I’m using Windows 7, so these steps will be for that version of Windows Media Player
  7. Click the icon to drop the player into library mode.  I circled it in red for you:
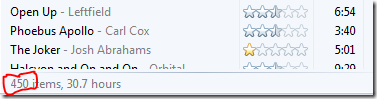
  8. Before we save the playlist, we have to remember that the HP MediaSmart streamer has a limit of 500 songs in a playlist.  Windows Media Player will tell you how many songs are in your playlist at the bottom of the “Now Playing” list.  Make sure this is < 500 before you continue.
  9. Now we need to save the list as a .m3u file.  Again press the ALT key to activate the menu, and hover over File and click on Save Now Playing List As…
  10. Choose the same location, the Desktop, just to keep things easy.  Then drop the Save as type box down and choose the .m3u one:
  11. Change the extension on the file name to .m3u and save the file:

Now we’ve got a .m3u file.  All of the above steps are to convert from either a .zpl file or a .wpl file as you see fit.  If you already have .m3u files, those steps can be skipped.

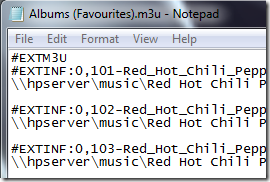
Now, as I mentioned above.  I dropped custom .m3u file into the music folder before, and it didn’t work.  The challenge here, is since the streaming app is running in the context of IIS, it’s access to the folders on the server is limited.  If you opened the .m3u file in notepad, you'd see that each music file’s location is referenced as “\\HPSERVER\Music\<Path to song>” .  IIS doesn’t have access to this.  So we need to reference from the directory that the playlist is going to be stored in.  I keep my playlists at the root of the Music directory, so we’ll do it this way.

To make the playlist readable by the Streaming application, we need to change the path to the file location:

  1. Open Notepad on your computer.  I use Start, then Run, and type Notepad and press Enter
  2. Drop the .m3u playlist you created into the notepad window using the mouse, you’ll see it has the path to the file as mentioned above:
  3. Click Edit and then Replace.
  4. In the "Find what:" box type in \\hpserver\music\ , in the Replace with: box type .\
    1. .\ is a reference to the location of the playlist file of where you will place it on the server.  If you plan to put it in a folder such as \\hpserver\music\playlists, then you should use ..\ instead.  the period references the current directory, two periods represent one directory higher, three periods are 2 directories higher, etc. 
    2. Don’t forget the \ at the end of each item, otherwise you may build an invalid path to the music file!
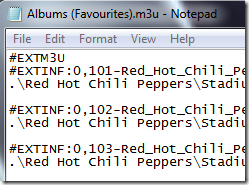
  5. Click Replace All and the file should change to look more like this:
  6. Save the file now using the File and Save menu in Notepad, then close Notepad.

Now we have a perfect .m3u file that won’t work from a client inside your network, but it WILL work from inside the media streaming web UI.  As the final step:

  1. Copy the .m3u doctored file over to \\hpserver\music.
  2. Log into your media streamer
  3. Enjoy your familiar playlist from the Zune software, or any other application you use to create playlists.
    1. You may have to wait for the TwonkyMedia server to recognize the new playlist and show it in the UI
    2. Finally, the TwonkyMedia add-in periodically tests for new playlists, so it might not appear for a while.  The first one I did appeared in 10 minutes, the second one took a few hours.

Phew.  I think I broke a sweat on this one.  It’s not pretty, but it works, I now have my familiar playlists on my EX485 HP MediaSmart server, available for media streaming. 

I do want to ask, does anyone know a better way to do this?  I’d love to have Zune automatic playlists automatically update on the HP MediaSmart server, but this is just a huge process to try to automate.