Friday, October 31, 2008

The Connected Home via Home Server @ PDC

If you want to know where Microsoft is taking your home, you might want to check out the videos of Home Server from the PDC (Professional Developers Conference). The specific video is Developing Connected Home Applications and Services for Windows Home Server.

There are some pretty exciting things in there about automation that will control your heater, air conditioner, blinds, TV, and the list goes on.

On the second day of PDC, CJ talked again about Exposing Connected Home Services to the Internet via Windows Home Server. Near the end, there is a bit on Windows Live Mesh, that I commented on earlier this week.

Connecting computers to the SBS Network

[This post courtesy of Steven Goddard]

This post goes over the different ways to join a client to the SBS 2008 network and differences.

HTTP://Connect

This method replaces the http://server/connectcomputer method. http://connect is a simpler url to remember, you don’t need to know or remember the server name. The goal of the web page is to do some pre requirements checking and guide the user through the experience before the Connect Computer program start. If we can detect the OS and browser version, specific instructions to that configuration are shown are shown on the web page to guide the user through the series of prompts they will see before the Connect Computer program starts. If we can’t detect that, a general set of instructions are presented.

Once you select “Start Connect Computer Program”, the wizard will start.

Note: see KB957708 if you the client machine can’t get to http://connect.

Portable Media

The second method involves creating portable media. Via the SBS 2008 Console, you can copy the Connect Computer launcher to portable media like a USB key. Then you can walk to each machine, plug in the USB key, and start the program (launcher.exe) that will download and start the Connect Computer wizard.

The wizard to do this is called “Connect Computers to your network” on the Getting Started Tasks and on the Network.Computers page. The wizard is a quick wizard. After the first page, you will need to select “Copy the program to portable media”.

image

Then, select the location to put the program.

image

Followed by the confirmation and the instructions how to run the program.

image

What is different between http://connect and the portable media method? They both launch the Connect Computer wizard (to be covered in a forthcoming post). However, if you can’t get to http://connect due to networking issues (lets say you are still getting DNS info via the router), you will get page not found. Running launcher locally, if it can’t get to the server, it will do a repair network. This will include doing an ipconfig release and renew. At this point, the client machine should get an IP from the SBS server, and able to get to the package to download the connect computer wizard.

Native domain join

You can always still natively domain join computers. The Connect Computer program only supports XP SP2 and above, Vista. So for older OS’s or server SKU’s, you will have to natively join them to the domain.

Thursday, October 30, 2008

Windows Home Server & Mesh, together soon!

If you haven’t seen what Mesh can do, then you haven’t moved into Web 2.0 yet.  Granted it’s still in Beta, but it’s very very cool.  Being able to sync your files with the cloud and desktops has simplified my life greatly.  In addition to access to your files from any connected device, you can remotely connect to any PC, regardless of firewall configuration!  What will make it even cooler is when it can combine with Windows Home server via an add-in.

Looks like they announced some of that at PDC this week.  Details on the HomeServer Blog.

Hyper-V Official Whitepaper now available!

The Official Hyper-V documentation for SBS 2008 is now available online.

This document provides an overview of the use of virtualization in a Windows® Small Business Server 2008 (Windows SBS 2008) environment, and discusses scenarios in which Windows SBS 2008 supports the Hyper-V technology.

Be sure to review the known issues list.

Wednesday, October 29, 2008

More on Autodiscover, for Windows Mobile and Gotchas with Certificates

A previous post introduced and explained how Autodiscover works in SBS 2008.  Today I want to dive a little deeper into the gotchas to be weary of when using self-issued certificates, and talk about what you need to do with Windows Mobile to make this work as well

Self-Issued Certificates

First of all, make sure you understand the self-issued certificate, and how that differs from a Trusted certificate for web traffic.  If you can swing it, with today’s SSL prices for a simple SSL cert, it’s far worth the money to get a trusted certificate than fight with your free self-issued certificate.

If you must use the Self-Issued certificate, any domain joined client computers or laptops will automatically get the self-issued certificate through Group Policy.  Any remote or non-domain joined computers will not get the certificate automatically, and you will need to manually install the root certificate on these computers. SBS 2008 provides a great tool to do this automatically (This tool is not designed for the iPhone).

To make sure Outlook Anywhere, or Autodiscover function correctly, you must install the self-issued root certificate on the client, or install a trusted certificate on the server in order for you to successfully configure Outlook Anywhere using the Autodiscover feature.

Windows Mobile

Windows mobile falls into much the same pitfalls as Outlook with a self-issued certificate.  Remember, the certificate is used to verify the identity of the server to the client computer or mobile device, much like your driver’s license validates you are who you say you are when getting on a plane.  If your server is configured to use a self-issued certificate, the device will refuse to talk to the server, because the SSL chain is not trusted.

To recap here:

  1. Purchase and Install a Trusted Certificate on the server before setting up Outlook Anywhere, or any Windows Mobile/iPhone type devices, OR
  2. Install the self-issued root certificate on remote clients, or Windows Mobile devices before you continue with connecting the PC or Device to the server

Monday, October 27, 2008

Autodiscover and Outlook Anywhere

[This post comes courtesy of Steven Goddard]

The Autodiscover service is new feature of Exchange 2007 and Outlook 2007. The goal of the new Autodiscover service is to reduce the time spent configuring clients. Autodiscover aids in profile creation and passing the URL’s back to the client for the Offline Address Book (OAB), free/busy, and Out of Office settings. You will see a number of new virtual Directories (vdir’s for short) in IIS, including Autodiscover, OAB, EWS.

Note: During SBS setup, all Exchange vdir’s are “moved” form the “Default Web Site” to the “SBS Web Applications” site.

Outlook Anywhere used to be known as RPC over HTTP in the SBS 2003 timeframe. It has been renamed, but in general, it is the same. It allows an Outlook client to communicate to the Exchange Server over HTTPS. No special ports need to be opened up, just the standard 443. Exchange builds upon the Windows 2008 feature “RPC over HTTP Proxy”. It works with both Outlook 2003 and Outlook 2007. Outlook Anywhere is automatically configured when you run the Internet Address Management wizard.

Here is some more info for Autodiscover and more info for Outlook Anywhere.

What does this all mean?

With Outlook 20007 and Exchange 2007 in SBS 2008, profile creation and ongoing maintenance is greatly simplified thanks to Autodiscover. Setting up Outlook Anywhere is automatic as well.

On domain joined machines, when a user starts Outlook 2007 for the first time, they no longer have to specify any information if their computer is joined to the domain. Outlook 2007 will start, gather the information automatically, log the user on to their mailbox, and begin retrieving information from your Exchange deployment.

On remote/non domain joined machines, you will have to do a few extra steps, but a lot less than the manual configurations with Outlook 2003 for RPC/HTTP. Basically, you will need your email address and password and you are ready to go. First, fill in the info below:

image

Outlook 2007 will try to use find the Autodiscover XML at:

  • https://contoso.com/autodiscover/autodiscover.xml
  • If above fails, outlook will try https://autodiscover.contoso.com/autodiscover/autodiscover.xml

Both of those will fail in the default SBS case as the info is actually at https://remote.contoso.com/autodiscover. With Outlook 2007 SP1 and above, outlook adds a third check. It checks a SRV record, or service. When you run the Internet Address Management wizard with a partner, this SRV record is automatically set. It looks like:

  • _autodiscover._tcp IN SRV 0 0 443 remote.contoso.com

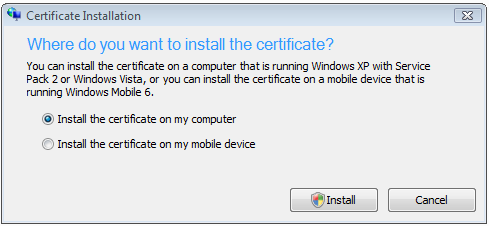
Outlook will pop up the following informational popup:

image

After selecting allow, Outlook will receive the XML information from the SBS/Exchange server, and automatically create your profile including your Outlook Anywhere settings.

image

What about Outlook 2003?

Outlook 2003 story is similar to SBS 2003. For domain joined machines, we push a PRF file down to aid in first time profile creation to the Exchange server. Outlook Anywhere must be configured manually for domain joined machines (i.e. laptops) and non domain joined remote machines. Instructions are on Remote Web Workplace.

image

So make sure those Service (SRV) records are configured correctly!

Make sure you continue reading to the Windows Mobile and Gotchas with Self-Issued Certs!

Saturday, October 25, 2008

What happened to SBS 2003 R2 + Software Assurance?

Where did it go? it was removed from Volume License pricelists?

Well, Eric Ligman has a final solution for you over on his blog. The key piece being:

If you are looking to get your clients an SBS 2003 R2 Server license with Software Assurance, here is what you should do:

  1. Purchase a Retail Box SBS 2003 R2 Server license from your distributor
  2. Add Software Assurance to it within 90 days of the purchase (best off to do it on the same order to make sure you get it added)
  3. Follow the steps to claim the SBS 2003 R2 deployment rebate for your client

More details on Eric’s Blog.

Friday, October 24, 2008

How to use Resources & Equipment with Exchange 2007 in SBS 2008

In most offices, there are shared resources, this might be a room, a digital camera or a car.  These resources can typically only be used or be in one place at a time, and it’s a hassle to schedule it. 

With Exchange 2007, you can configure rooms or resources to be scheduled by the employees of the business.  It’s super easy:

  1. On the server, click Start, and then point to All Programs, Microsoft Exchange Server 2007, and click on Exchange Management Console.
  2. Expand Recipient Configuration, and select Mailbox.
  3. On the right-hand side click on New Mailbox ...
  4. Choose a Room Mailbox if you are configuring a meeting room, or an Equipment Mailbox if you are configuring a piece of equipment like a car or a camera, and then click Next.image
  5. On the User Type screen, choose New User and click Next.
  6. On the User Information page, enter the name of the conference room, I chose “Conference Room 1” with a username of Conf1, and give it a strong password you’ll remember, click Next.
  7. Verify the alias is Conf1 on the next page, and browse to a mail database (there is only one on SBS) and click Next and New on the next page.

At this point, your meeting rooms will tentatively accept all of the meetings and you can see where they are booked and not booked:

image

If you want the meeting request to auto-accept/auto-decline based on availability, you need to crack out the good ol’ powershell:

  1. Click Start, All Programs, Microsoft Exchange Server 2007, and launch Exchange Management Shell.
  2. Type in Set-MailboxCalendarSetting conf1 –AutomateProcessing:Autoaccept (where conf1 is the alias you defined above)

Now the Conference room will automatically accept anything that doesn’t conflict, and automatically decline anything that does conflict. 

image

If you want to learn more about what you can do with Resources and Equipment, there is an outstanding blog post at You Had Me At EHLO: Resource Scheduling in Exchange Server 2007.

Thursday, October 23, 2008

How Folder Redirection is different in SBS 2008

SBS 2008 treats folder redirection on a per user basis, instead of a per network basis like 2003 did.  What this means is that out of the box, the folder redirection policy applies to an empty security group (Windows SBS Folder Redirection Accounts).  This means that any user added to this group will get their folders redirected to the server for data protection purposes.

You can either add users directly to the security group, or use the handy UI on the Users’ Tab called Redirect folders for user accounts to the server.

image

By simply clicking on the User Accounts folder, you can choose which users have their folders redirected.  Additionally, as you can see above, you can choose what you want redirected.  We do not redirect the Start Menu by default, because if a client moves to a new PC, and that new PC doesn’t have the applications installed, the start menu is full of unknown icons.  Ugly!

Wednesday, October 22, 2008

Do I absolutely have to run DHCP on SBS 2008?

When running the Configure E-Mail and Internet Connection wizard in SBS 2003, you had the option to run DHCP services on the SBS server, or leave it on the router within the network.  There was no guidance one way or another, it was a choice you had to make to complete the wizard.

With SBS 2008, we provide guidance.

The guidance is that you should run DHCP on the server.  Why?

  1. Microsoft builds, and has been building a really high quality DHCP server built into Windows Server since Windows NT 4.  Why not get one of the highest quality DHCP servers on the market for your network?
  2. The SBS team can ensure your DHCP server is set up correctly on SBS, making sure there are no duplicate IP addresses, and that the exclusion range is set up correctly for the server’s IP address
  3. If you feel comfortable in the DHCP management UI, you can set up reservations to make sure the same clients get the same IP address.  This is handy for printers, or other things on your network that may act like servers, but you don’t want to manage the static IP address
  4. If you’re logging in remotely, you can see which clients are online by which ones have IP addresses in the DHCP management console.  You can also see the clients IP address right in the console, so it makes it easy to find clients on the network, especially if you are remote.
  5. DHCP uses limited resources and has essentially no impact on the server’s performance

If the above 5 reasons aren’t good enough for you, and you absolutely must run the DHCP service on the router, here is how you do it.

  1. Close the Windows SBS Console, and cancel the Connect to the Internet Wizard if it’s running
  2. Click Start and go to All Programs and expand Windows Small Business Server
  3. Click on Windows SBS Console (Advanced Mode)
  4. On the Network tab, select the Connectivity sub-tab
  5. Click on Start DHCP (image).
    1. At this point, the DHCP services will be forced to start.  Since you have another DHCP server running on the network, the DHCP service will stop itself, and log an event in the Event Log about how it can’t start because there is another non-authorized DHCP server on the network.  This is ok.
  6. Immediately click the same button, this time called Disable DHCP (image ).

Now the networking components of the server will ignore the fact that the DHCP service is not running, keep it disabled, and let you proceed with the Connect to the Internet Wizard without having to disable the DHCP services.

IMPORTANT: Please do not call Microsoft support with an incorrectly configured LAN DNS.  Make sure you make the SBS’s Internal IP address the primary DNS in your 3rd party DHCP server configuration.

Finally, the server is still going to alert you that DHCP services aren’t running, so to fix this:

  1. Flip on over to the Computers sub-tab on the Network tab.
  2. On the right, click on View Notification Settings.
  3. Uncheck the DHCP Server notification, and click OK.

image 

Now DHCP services is no longer running on the server, and SBS will be fine with that.  As a final note, please only do this if you have no other way around it, and if you’re familiar with your router UI to set it up correctly.  If not, just disable DHCP on your router, and we’ll take care of the rest!

Tuesday, October 21, 2008

“Fix My Network” Wizard in SBS 2008

In the previous version of SBS, the Configure E-Mail and Internet Connection Wizard (CEICW) could be run again and again and again ... and again.  If you had an issue with networking, you’d run the wizard as many times as you wanted to reset to the known SBS defaults.  With 2008, we provided a wizard for exactly this case, called “Fix My Network” wizard.

image

The wizard is designed to detect known problems on your network, and then give you the option to fix them or not.  There are roughly 70-80 different checks and fixes that it does.  Some important things to note:

  1. The fixes may have dependencies.  For example, if the wizard detects that the DHCP services are stopped, it will report that, but won’t be able to check the configuration inside the DHCP service, because it’s stopped.  So, it’s important to run this wizard a few times, until you’re happy with the issues it’s finding/not finding.
  2. If you replace your router on your network, or change your router IP address, you should consider running the Connect to the Internet Wizard first.
  3. The wizard is designed to bring the network back to a “known good” working state.  So any custom configuration will be un-done.

Now that you know how to use the wizard, what exactly are the things we keep an eye on?  Well, to know exactly, you will have had to work on the wizard, but here is the high level.

  1. Network Cards
    1. Disabled Network Cards
    2. Additional Network Cards
    3. Duplicate IP, Missing IP, Extra IP addresses
    4. Incorrect DNS, Gateway and subnet settings
    5. NIC unplugged from the network
  2. DHCP Configuration
    1. DHCP Enabled and running
    2. DHCP scope settings
    3. DHCP IPv4 and IPv6 settings
  3. Local DNS Configuration
    1. Missing Zones
    2. Invalid Names and domains
    3. Missing records
    4. Reverse Zones invalid or missing
  4. Internet DNS (if with a domain name partner)
    1. Missing Records
    2. Missing or incorrect credentials
    3. Domain configured and in good standing with provider
    4. Dynamic DNS client is configured correctly (if running)
  5. SSL Certificate Configuration
    1. Invalid Root and Leaf Certificates
    2. Invalid Certificate installation package
    3. Certificate installed on IIS
    4. Self-Issued certificates expiring or invalid
    5. Certificate authority is installed and running
    6. Trusted Certificate installed and valid
  6. Router Configuration
    1. Gateway can be reached
    2. Internet can be reached
    3. UPnP (if available) port mappings
  7. VPN (if enabled)
    1. Firewall configuration
    2. RRAS service enabled and running
    3. VPN default Policy is in place
  8. E-Mail Configuration
    1. SMTP connectors configured correctly
  9. IIS Configuration
    1. IIS is enabled and running
    2. Host headers are configured correctly

A Common Question

Question: Does SBS support NIC Teaming?

Answer: The core OS supports it, but not the SBS wizards, it’s recommended you configure your network with a single network card, and then set up the team afterwards.  Microsoft Support mentions they may ask you to disable the team for any troubleshooting.

Monday, October 20, 2008

Windows SBS 2008 Spanish, Dutch, French, Polish RTM

Hola! Hello! Bonjour! Witajcie!

Today marks the day when SBS 2008 starts shipping localized versions. SBS plans to release in 18 different languages, the second 4 countries that will be available are: Spanish, Dutch, French, and Polish.  They have released today and will be available as soon as possible.  I’d suspect anywhere from 1-5 months after the English version is available.  We can’t control the fill of the channels.

Don’t forget the Product Launch on November 12th, for details, visit the Dream Server Launch Site!

Friday, October 17, 2008

Windows SBS 2008 Advanced Console

By default, when the console opens when you log in, the Console is in normal mode, not advanced mode.  But there are extra buttons and gadgets in the advanced console for you to play with. Simply close the console, and open the Advanced console:

image

I bet your wondering what the differences are.  Well, they are very subtle:

Users & Computers Tab

  • Users Sub-tab: Link to open Active Directory Users and Computers snap-in.

Network Tab

  • Devices Sub-tab: Re-install the Fax service
  • Connectivity Sub-tab: Start/Stop DHCP services (use this if you absolutely must use DHCP on the router)
  • Connectivity Sub-tab: Manage DNS Snap-in
  • Connectivity Sub-tab: Manage DHCP Snap-in
  • Connectivity Sub-tab: Manage Certificates Snap-in

That’s it.  Some added links for you to make management simpler.

Also, for your convenience, there is a “Native Tools Management”, which includes many of the native tools you might need to troubleshoot, or make any custom settings.

Thursday, October 16, 2008

Windows SBS 2008 Best Practice Analyzer

`

Due to the overwhelming number of downloads for the SBS 2003 Best Practice Analyzer, the product team, and support team has worked extra hard to get the 2008 Best Practice Analyzer out before the general availability of the product on November 12th.

So, if you’ve already got your SBS 2008 server(s) up and running, you can start immediately with the Windows Small Business Server 2008 Best Practice Analyzer.

To download, click here.

Officially announced on the Official SBS blog.

Understanding Windows SBS 2008 Anti-Spam/Virus updates

[This post co-authored with Steven Goddard]

Exchange Server 2007, bundled with Forefront Security for Exchange that both come with SBS 2008, you get a lot of protection on your e-mail.  But how does it actually work? Let’s break it down.

With Exchange 2007 only

If you only have Exchange 2007, without Forefront Security for Exchange (FSE), then with SBS 2008, you get the Exchange Standard CAL.  This CAL entitles you to content filter updates that are published every two weeks via Microsoft Update.  You can reference this TechNet article for more information on this.

With Exchange 2007 and Forefront Security for Exchange

If you chose to install Forefront Security for Exchange during SBS setup, you are entitled to more regular updates (You can also do this with an Exchange Enterprise CAL, this is not included with SBS).

When checking multiple times a day, you get the IP Repudiation Service Data (an IP Block list that is offered exclusively to Exchange 2007 customers), spam signature data, as well as the content filter updates.

Make sense? If not here is some extra reading on TechNet.

Note on un-installing: If you choose to un-install FSE after the trial, you are no longer entitled to updates more than every two weeks.  You will have to do this manually.

SBS Specific Information

If you install FSE during SBS setup, then you get the anti-spam updates multiple times a day.  However, FSE asks Microsoft Update, which on your machine is WSUS (if you left it installed).  WSUS only asks the actual Microsoft Update, once/day.  So you are still ahead of the two week standard server, but you aren’t at your multiple-times-per-day, so you may want to consider changing your schedule, if this is important to you.

Data Usage Note: If you pay for bandwidth, it’s important to not that each signature download is roughly 6MB, and with this happening multiple times a day, you could be using more data than your used to.  On the second paragraph of this TechNet article, it talks about how it checks for signatures multiple times per hour.  Make sure to adjust the schedule to meet your needs (and in some places, budget):

image

Thanks to Philip for pointing out the confusion between Exchange 2007 and Exchange 2007+FSE, and to Wayne for pointing out the download size.

Wednesday, October 15, 2008

60 days not enough time to evaluate SBS 2008?

It’s true, you get 60 days to trial SBS.  All of SBS, that’s a lot of things to test out in 60 days.  Well, you are in luck!  With a simple command line you can extend the 60 day trial, another 180 days for a total of 240 days.  It’s super easy.

First you need an elevated command prompt.  Once you have one of those open, simply run the command line slmgr.vbs –dli.  This command takes a few minutes to run, and pop’s up a screen to tell you how long you have left in your evaluation period. 

To extend the evaluation period, you can add the extra 180 days from the same elevated command prompt type in the command slmgr.vbs –rearm.

But I must warn you, once you get past day 80, studies have shown that SBS is so addictive, that it will most likely be a major part of your network, and you’ll be committed.  So choose wisely if you plan to extend the evaluation period, you could end up buying it!

More details in KB 948472.

Tuesday, October 14, 2008

Windows SBS 2008 Brazil, German, Italian and Turkish languages RTM

Olá! Hallo! Ciao! Selam!

Today marks the day when SBS 2008 starts shipping localized versions. SBS plans to release in 18 different languages, the first 4 countries that will be available are: Brazil, German, Italy, and Turkey.  They have released today and will be available as soon as possible.  I’d suspect anywhere from 1-5 months after the English version is available.  We can’t control the fill of the channels.

Don’t forget the Product Launch on November 12th, for details, visit the Dream Server Launch Site!

Windows Essential Solutions Launch is Right around the Corner!

November 12th is creeping up faster than you are probably thinking about it.  The Launch will be a virtual launch, hosted at The Dream Server Launch website.  I will be participating in the launch event, along with a few of my SBS and EBS buddies.  Be there or Be Square!

Also, secure your position as trusted advisor by implementing Windows Essential Server Solutions to help your customers reduce costs and increase productivity by streamlining their IT infrastructure. Generate leads by inviting your customers and prospects to the Windows Essential Server Solutions special launch webcast using guidance and an invitation email template.


Monday, October 13, 2008

Hosting Multiple Domains on SBS 2008/Exchange 2007

[This post comes courtesy of Adam DePue]

A long time ago, in a version far far away, I blogged how to have Exchange 2003, on SBS 2003 answer for multiple domain names in this blog post (along with 3 other parts for across SBS 2003). For all 4 of blog posts, the idea is still the same, except the steps and UI may have changed.  Since I’ve already we’ve already seen people asking how to have Exchange host multiple domains with SBS 2008, I thought I’d blog it.  Adam beat me to building and testing the steps, so this post comes from him!

So, to set up your primary domain name, please do run the Internet Address Management Wizard.

To set up your secondary (and more) domain, follow these steps:

  1. Click Start and point to All Programs and click on Microsoft Exchange Server 2007 and then launch the Exchange Management Console.
  2. Expand Organization Configuration and select Hub Transport.
  3. On the right, under Actions, click on New Accepted Domain …, and wait for the wizard to pop-up
    1. In the Name field, enter a friendly name, like Contoso Email
    2. Accepted Domain field, enter the domain name you’d want to appear after the “@” in the email, e.g.. contoso.com
    3. Finally, leave setting set to Authoritative Domain.
    4. Click New to create the new domain name, and then Finish once it’s done processing.
  4. On the right, under Actions, now click on New E-Mail Address Policy …, and wait for the wizard to pop-up
    1. Enter a friendly name, like Contoso Email Policy, leave the default as All recipient types, and click Next.
    2. Ensure no extra conditions are applied and click Next.
    3. Click Add… to add a new E-mail address format
      1. Ensure E-mail address local part is checked, and use alias is selected.
      2. Specify a custom fully qualified domain name (FQDN) for e-mail address should read the same as the domain name you’re adding from above.  Here is a screenshot: image
      3. Note: double check the use alias, as it could change by specifying a FQDN, then click OK.
    4. On the Schedule page, ensure Immediately is selected and click Next.
    5. Click New to execute the policy, and then Finish once it’s applied.

Important: Any new domain you set up becomes primary (what users send-as), so you’ll have to use the steps below to update which one should be primary.

At this point, provided your Internet DNS MX addresses for both domain names are pointed to the WAN IP of the SBS network (typically the WAN IP of the router, or ISA firewall), you will now receive email for both domain names.  By default, the new domain you added will be the primary domain name, and the domain everyone sends as.

One important thing to note is that the SBS console will only show the primary domain name in the console.  If you want to switch which domain is primary, you can do that too:

  1. Open up the Exchange Management Console again and expand Organization Configuration, and select Hub Transport.
  2. Right-click on the policy for the address you want to be primary, and click on Change Priority, and change it to “1” (without the quotes), and click OK.  Exchange will adjust the priorities on the other policies automatically.

One final thing to note, is that if you’re primary domain name is automatically managed by a domain name provider, we will only keep the primary domain IP address up to date with the domain name provider.  So if you are on a Dynamic IP, and rely on the Dynamic DNS client included with SBS 2008, you may want to consider some DNS configuration that keys off the “A Record” of the primary domain name, as that’s the only one we adjust.

Thursday, October 09, 2008

Changing the Scroll Wheel speed on the Samsung Jack (BlackJack II)

Just picked me up a Samsung Jack, I love it.  It’s responsive, it’s got the full tactile keyboard (touch screen wasn’t doing it for me), and it’s been flashed to Windows Mobile 6.1 from the Samsung Support Website (Simply search for “Windows Mobile 6.1” and you should find it).

The only drawback of the phone was how slow the “wheel” scrolls.  This is configurable in the Registry.  Simply browse to HKLM / Software / Samsung / KeyRun.  Push the Values button, and look for WheelSpeed.  Change the value to 0, and close the registry editor, no reboot required.

[Information Provided by MobileJaw.com]